
Posting a shift
Posting a shift on Qwick is simple! In just a few clicks, your shift can be published to our network of over 800,000 vetted hospitality professionals. From there, our proprietary matching algorithm will fill it with the best possible match for the role.
Ready to get started? Read on for everything you need to know about posting shifts on the Qwick platform.
How to post a shift
If you haven’t already, sign up with Qwick! Once you create an account and provide your business’s information, you can begin posting. It’s free to sign up with Qwick, and you only pay once you complete a shift.
Sign in to the Qwick Business platform and navigate to the Post tab.
Determine the correct posting flow to use for the shift(s): post shift, post schedule, or create event.
Select post shift if you want to post:
A singular shift (e.g., 1 dishwasher on May 1st)
Multiple shifts for the same role and day (e.g., 30 banquet servers on May 1st)
Any number of shifts for the same position that repeat on a set cadence, known as recurring shifts (e.g., 2 baristas every Sunday)
Select post schedule to post multiple shifts across various days and/or positions (e.g., varying quantities of event chefs, banquet cooks, bartenders, banquet servers, and banquet captains for multiple events throughout the month).
Select create event to post multiple shifts tied to a specific event (e.g., all positions needed for a 3-day music festival or catering shift).
Learn more about posting a schedule or an event here—for the rest of this walkthrough, we’ll focus on posting a shift.
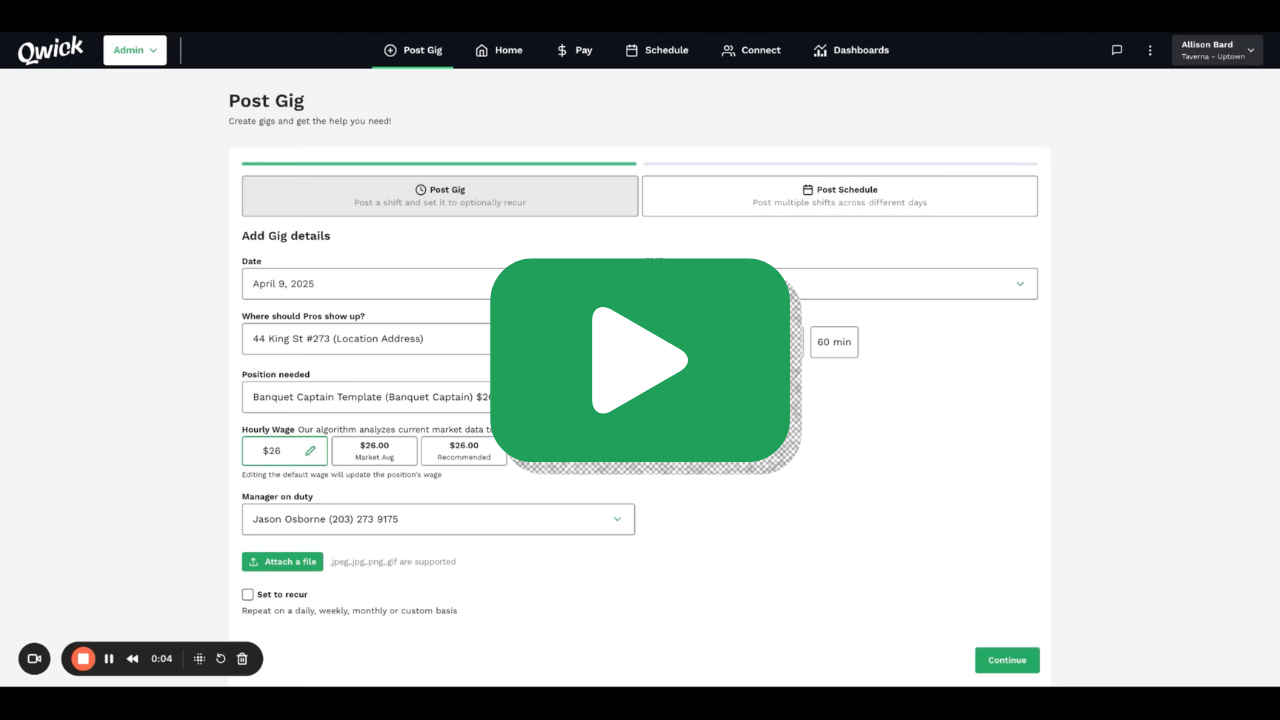
Begin filling out the shift details:
Date: The date that the shift will take place. (If it is a recurring shift, enter the first date that you want the shift to occur. You will adjust the frequency at the bottom of the page.)
Shift: The start and end time for the shift, including the time zone.
Where should pros show up? Click the address to open your venue templates, then select an existing one or add a new one. Enter the complete address where you want pros to arrive for the shift. Be sure to include all relevant details someone would need to enter the address into a navigation system, such as the zip code and unit number. There's no limit to how many venue templates you can have, so it's best practice to make them as specific as possible and include all relevant parking details, arrival instructions, and attach any helpful documents like maps.
Unpaid break: Let pros know if they can expect to take an unpaid break, and if so, how long by selecting from None, 15 minutes, 30 minutes, or 60 minutes. This time will be automatically deducted from their pay when they clock out, and the manager on duty is responsible for facilitating any unpaid breaks. (Be sure to abide by state labor laws.)
Parking details: Specify if parking will be Free, Paid-reimbursed, or Paid-not reimbursed.
Arrival instructions: Type out exactly where the pro needs to go upon arrival (e.g., "Enter through the glass doors by the fountain") and attach maps or other helpful visuals.
Position needed: Select your desired position from over 25 hospitality-specific roles. Qwick professionals are vetted for the experience and certifications necessary for each position they are eligible to work, so you can feel confident knowing that the talent you receive will be qualified.
Positions Available | |||
Bar + Beverage | Front of House | Back of House | General |
Barback | Banquet Captain | Dishwasher | Banquet Setup |
Barista | Banquet Server | Baker/Pastry Chef | Coat Check Attendant |
Bartender | Busser | Banquet Cook | Concession Worker |
Bartender - Fixed Menu | FOH Support | Event Chef | Event Help |
Beer + Wine Bartender | Food Runner | Food Assembler | General Cleaning |
Mixologist | Restaurant Server | Line Cook | General Laborer |
Server Assistant | Prep Cook | Housekeeping | |
Stage | Maintenance | ||
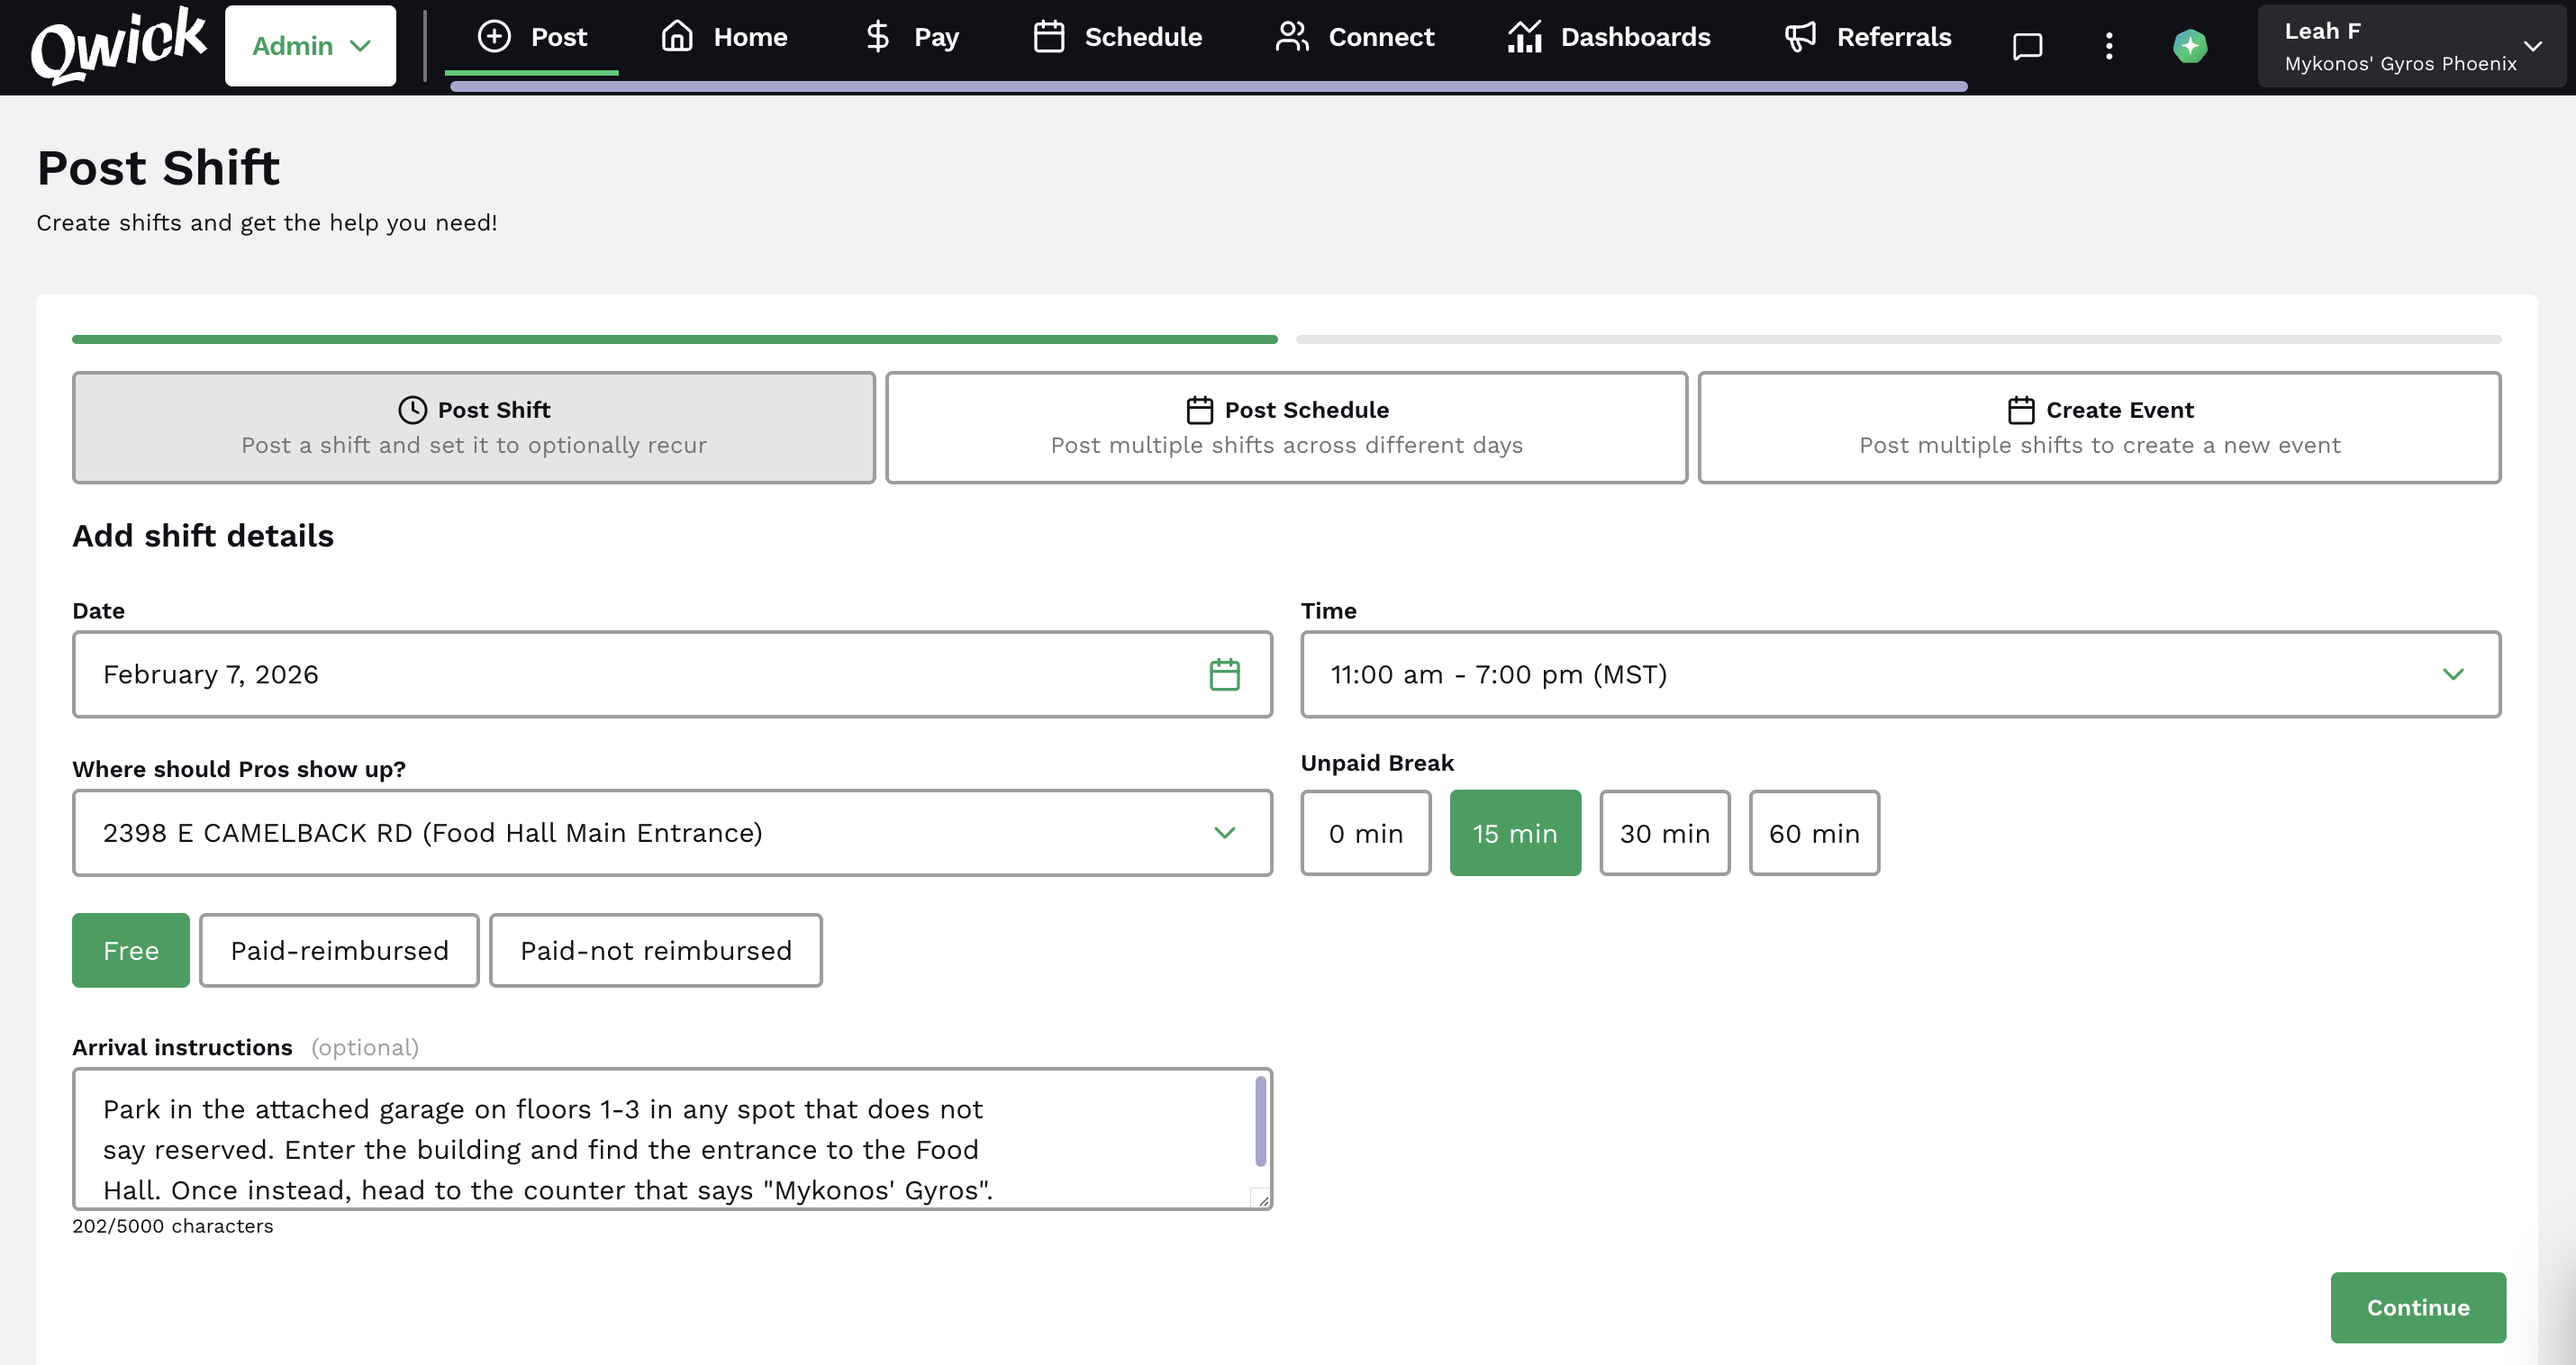
Once you’ve selected the position, you will notice the position description populate with sample text. While this gives you an idea of the type of information to share, we encourage you to update the description with information that is relevant to your business and the role at hand. Will this position require operating a specific type of equipment? Interacting with guests? What activities are they responsible for during their shift?
From there, you’ll set the hourly wage for the position, mark requirements for the shift, such as uniform specifications or proof of vaccination, and designate any accessories like cooking tools or hair restraints the pro will need to bring. You can add your own inputs to customize these sections to your exact needs. The more specific you can be, the better!
Next up is a section for private notes, which are shared with professionals once they are confirmed on the shift. While optional, it is best practice to use this space to share any position-specific information that will help set pros up for success. Consider the following topics when drafting private notes:
Dress code requirements for the position listed
Links to menus or recipes you would like pros to review
Important reminders about policies or rules to follow (e.g., no phones allowed on shift, clear bag policy)
If any of these details are better communicated visually, simply attach a file and the professional will see it in their app.
Now that you’ve built the perfect position overview, be sure to check the box next to save as template to save your entry for use in future shift postings. Click the request a pro button to save your position and return to posting your shift.
How many?: Enter the quantity of professionals you want to show up for the shift. Whether you need one professional or 100, we have you covered.
To ensure you receive the shift help you need, we will occasionally fill your shifts with more professionals than the number you requested, especially during seasons when cancellations and no-shows are common. You’re welcome to send the extras home if the help isn’t needed. Click here to learn more about overfills.
Hourly wage: This is the hourly pay rate that professionals will earn for working the shift.
You set the rate for each shift, but please note that the platform has minimums built in to adhere to minimum wage requirements and ensure living wages for Qwick professionals.
We’ll also guide you with market averages and recommended rates to ensure that your shift is enticing to top-rated professionals.
It’s important to note that once a shift is posted, rates can be increased, but not lowered.
Marketplace or preferred workers: Here, you can control which professionals can see your shift. Posting to the marketplace makes the shift visible to all eligible professionals in your area, while selecting preferred workers limits visibility to professionals who have already worked with your business or are saved in your groups and allows you to send direct offers to specific pros. Learn more about selecting preferred workers here.
Manager on duty: Provide the name and phone number of the onsite manager that pros should check in with upon arrival for the shift.
Attach a file: If desired, attach a .jpeg, .jpg, .png, .pdf, or .gif file to share important shift or event information. This is a great place to share maps, parking instructions, specific examples of uniform requirements, details about specific procedures, or any other resources that a pro might find helpful before the shift.
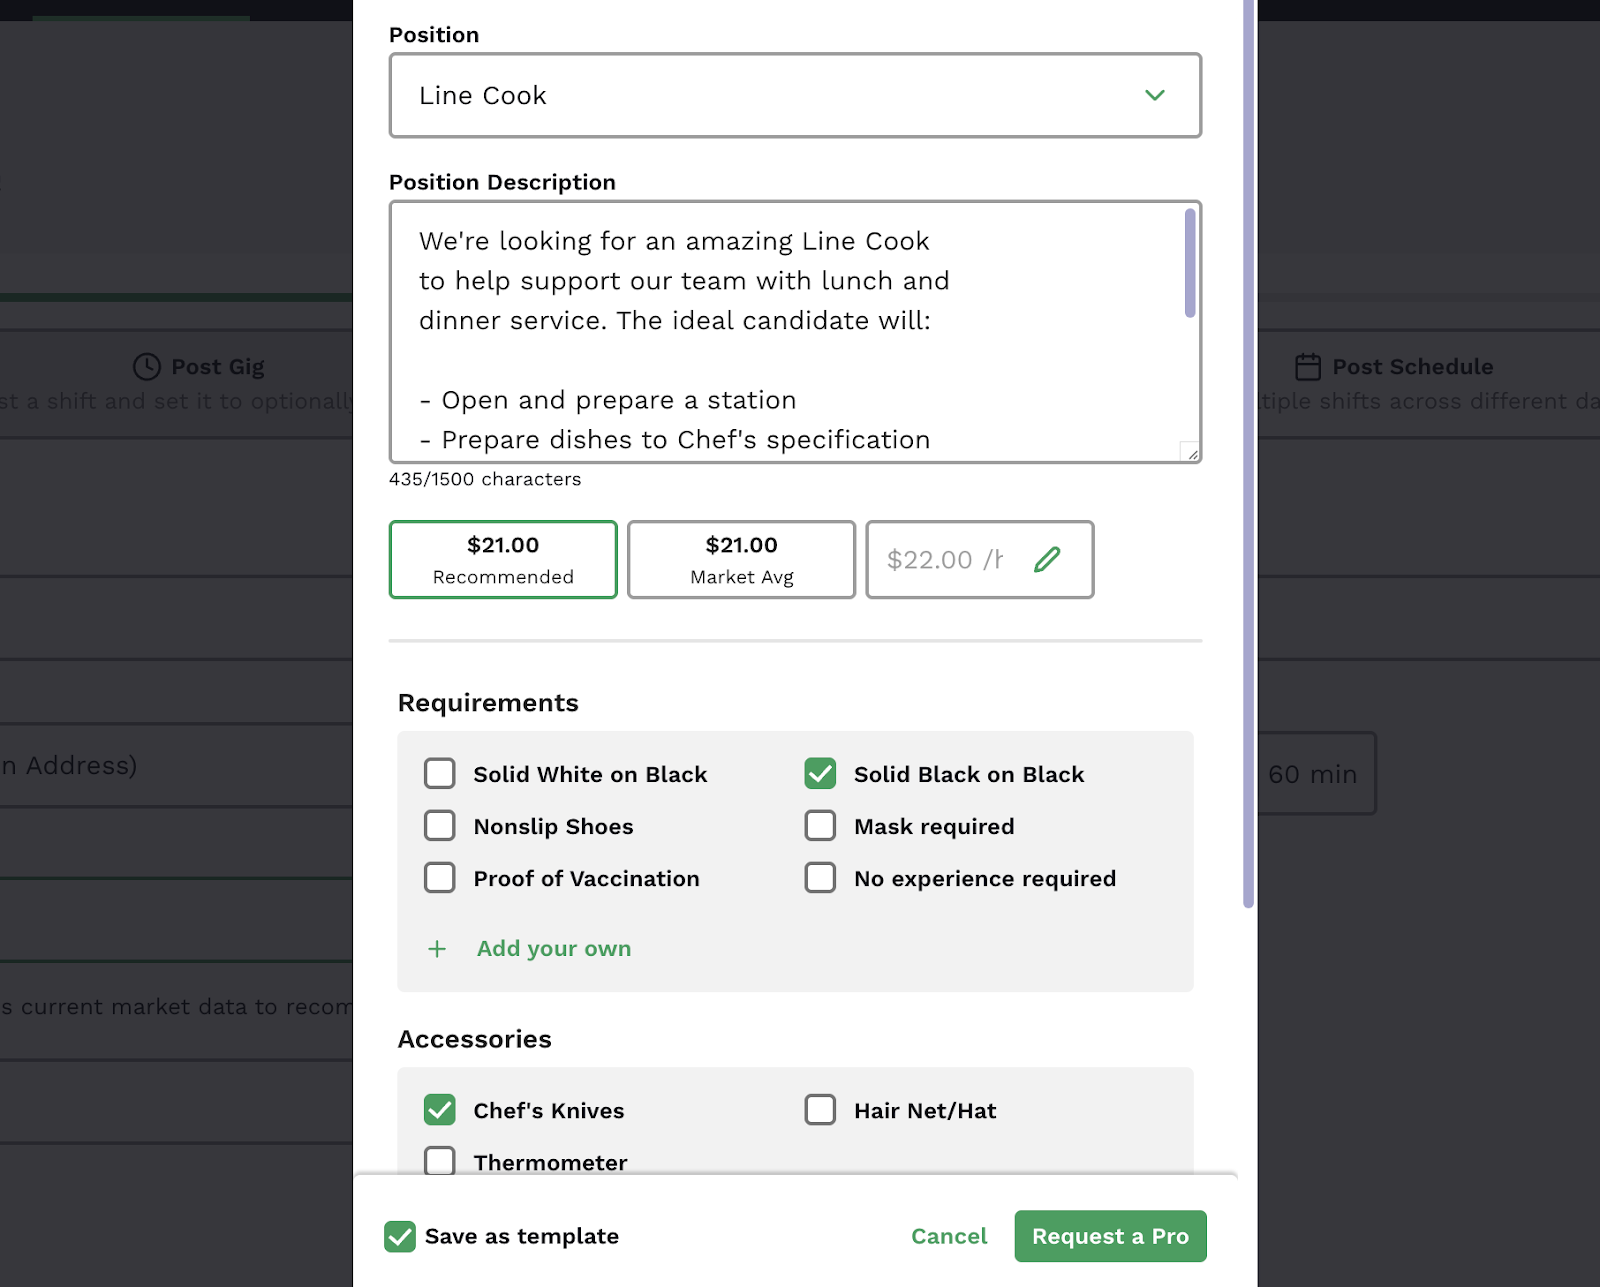
Set to recur: Check this box to save time on future postings and select a cadence that you would like this shift to repeat on. You can program shifts to recur on specific days of the week (e.g., every Wednesday) or repeat at a set interval (e.g., every 2 weeks). You can also program an end date for the recurring postings to cease.
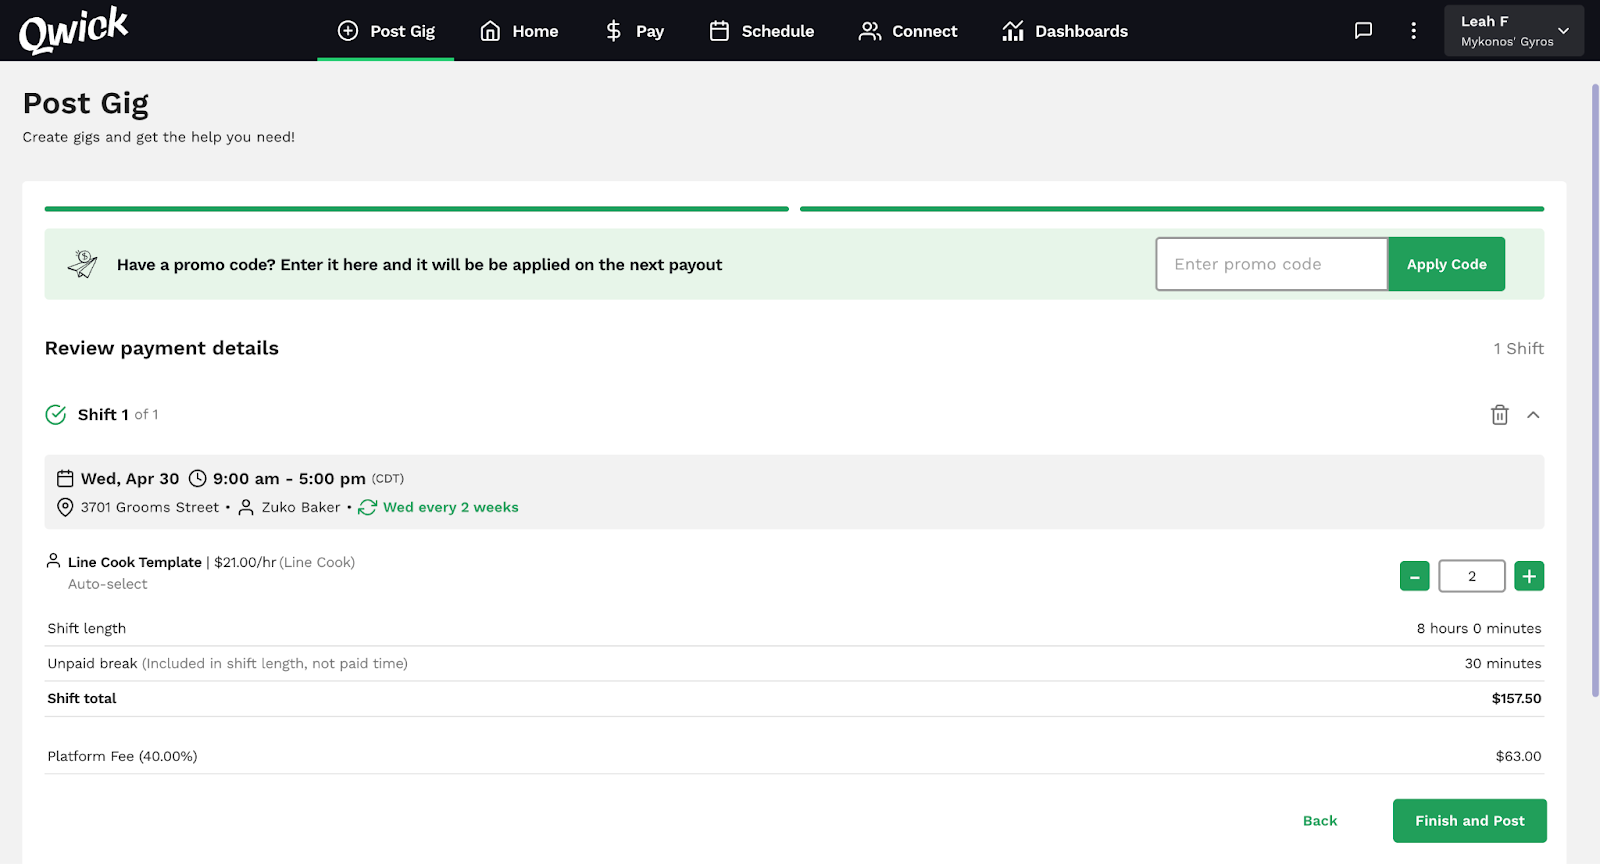
Once you’ve entered the shift’s details, press continue and review them to ensure everything is accurate. Hit finish and post, and your shift will then be visible on the mobile app used by our pros.
Sit back and relax! Our proprietary matching algorithm will select the best pros for your shift based on their availability, ratings, and skills. You will be notified by SMS once pros have been selected and confirmed for your shift.
Best practices for posting shifts
Post shifts well in advance, especially for holidays or special occasions. The earlier you post, the better your fill rates will be. Additionally, this allows you to secure your favorite pros before they make other plans and offer average wages without having to increase rates to incentivize them to fill a last-minute shift.
If you do post a shift that is less than 48 hours in the future, we recommend increasing wages. Even a $1-2/hour bump goes a long way in getting your shift filled with top talent!
Clearly communicate expectations to professionals via the shift description. Provide a detailed description of the role and responsibilities, uniform requirements, and any background on the business or event that might be helpful.
Don’t be afraid to get specific. (E.g., if you’ve had issues with people wearing yoga pants to shifts instead of black slacks, that is a good thing to call out)
Leverage shift templates to save and apply your most-used position details, times, locations, and managers, enabling you to post shifts in mere seconds.
Sending direct offers
If you haven’t already, it’s only a matter of time before you meet Qwick pros you adore working with and wish you could have on every shift! When that happens, know that you have the ability to send direct offers to your preferred pros for your shifts. Learn more about direct offers and how they work here.
Bundling shifts
If you prefer the same professional to work a series of shifts, you can bundle them to require all of the shifts to be accepted by the same pro. Bundles require all shifts to be for the same position (e.g., dishwasher, banquet server, mixologist), as well as a monetary bonus of your choosing to incentivize pros to accept the bundled shifts. (This can be any amount greater than $1!)
To bundle shifts:
Post all of the shifts you want included in the bundle.
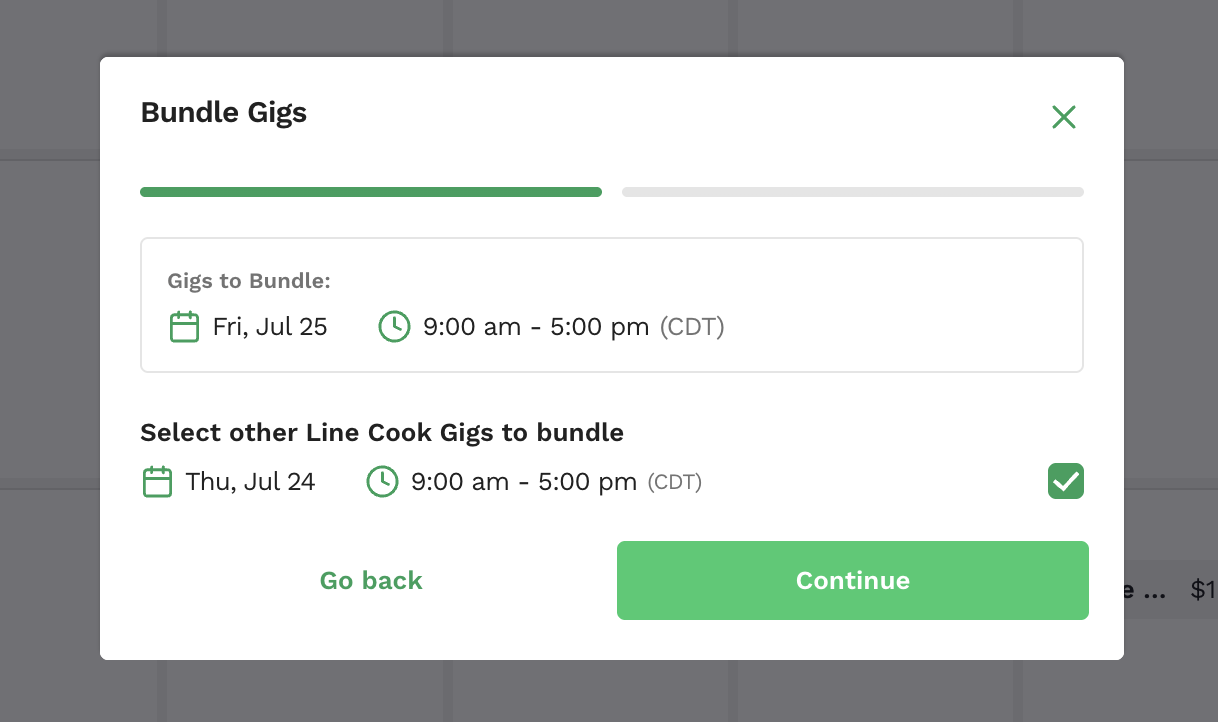
In the schedule tab, click on one of the posted shifts you want to bundle. Click the three dots in the top right-hand corner of the shift and select bundle gigs.
Choose all of the shifts you wish to bundle, then click continue.
Now, enter the bonus amount you will offer. (Bonuses are paid out on the final bundled shift. For instance, if you offered a $25 bonus for three bundled dishwasher shifts with normal wages totaling $100 each shift, the payouts would be $100 for shifts one and two, and then $125 for shift three.)
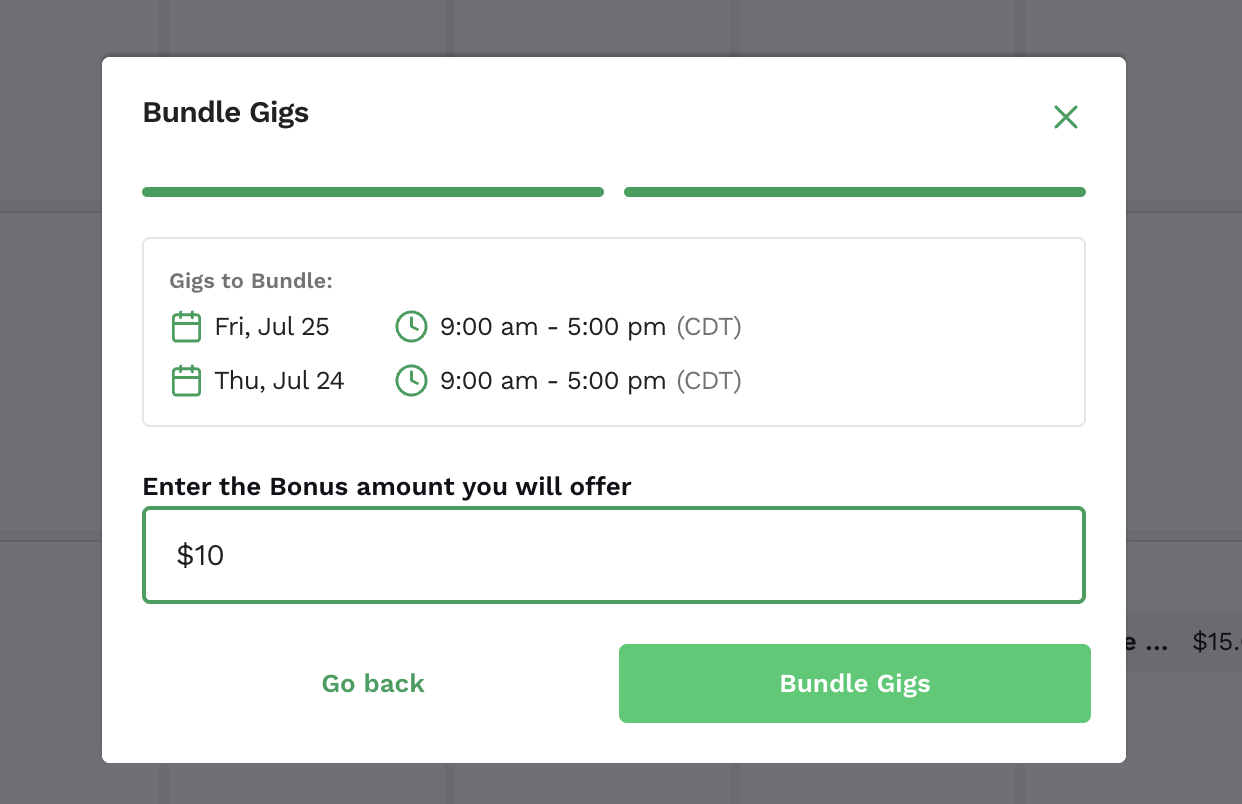
Press bundle gigs to save changes, then the selected shifts will appear as a bundle for pros in the Qwick app!
Please note that once shifts are bundled, they cannot be unbundled.
Shift settings
Also available in the options menu of a posted shift are the following shift settings, which you can toggle on or off:
Auto-select: If you want the platform to automatically fill your shift with the best-matched talent available, ensure auto-select is on. You won’t need to review any applications or make offers; we’ll simply notify you when the shift is filled, and you can then make adjustments to the personnel as needed.
Request 4-digit code to clock in: With this setting enabled, professionals will be prompted to enter a 4-digit code when clocking in for their shift. The code will be sent to the manager on duty one hour before the shift start time, and they should share this number with the pros as they arrive. (We recommend clock-in codes for large shifts such as festivals or sporting events.)
Automatically publish this gig to the marketplace if it is not filled by your network: Enabling this setting will allow your shift to be shared with the broader Qwick talent network if your preferred professionals are unable to fill it. We recommend enabling this setting for optimal fill rates!
Use overfill feature: Turning this on allows us to overfill your shift with more professionals than requested if we believe it is at risk of a last-minute cancellation or no-show. Enable this feature for optimal fill rates and use it in conjunction with the auto-select feature.
Editing a shift
If you need to go back and update a previously posted shift, you can do so by following these steps:
Head to the schedule tab and locate the shift you wish to edit.
Click on the shift to expand the shift details, and click on the three dots in the upper right corner to expand the options menu. Click edit gig.
You can adjust the following information:
Manager on duty
Number of requested pros
Private notes
Wage offered (This can only be increased, not lowered.)
Shift times
Unpaid break time
Be sure to press confirm to save changes before exiting the editor.
If you're editing a recurring shift, it will prompt you to choose whether you want to edit just this shift or all recurring shifts in the cycle. Select your preference to continue with the editing process.
Canceling a shift
Should the need to cancel a previously posted shift arise, you can do so easily.
Navigate to the schedule tab and locate the shift you would like to cancel.
Tap the three dots in the top right corner of the shift card and click cancel gig.
Select the reason for canceling, add a brief explanation, and finalize by pressing cancel gig.
Now that you’re an expert on posting shifts, continue learning the ropes by checking out these articles: