
Posting schedules and events
What does it mean to post a schedule or event on Qwick?
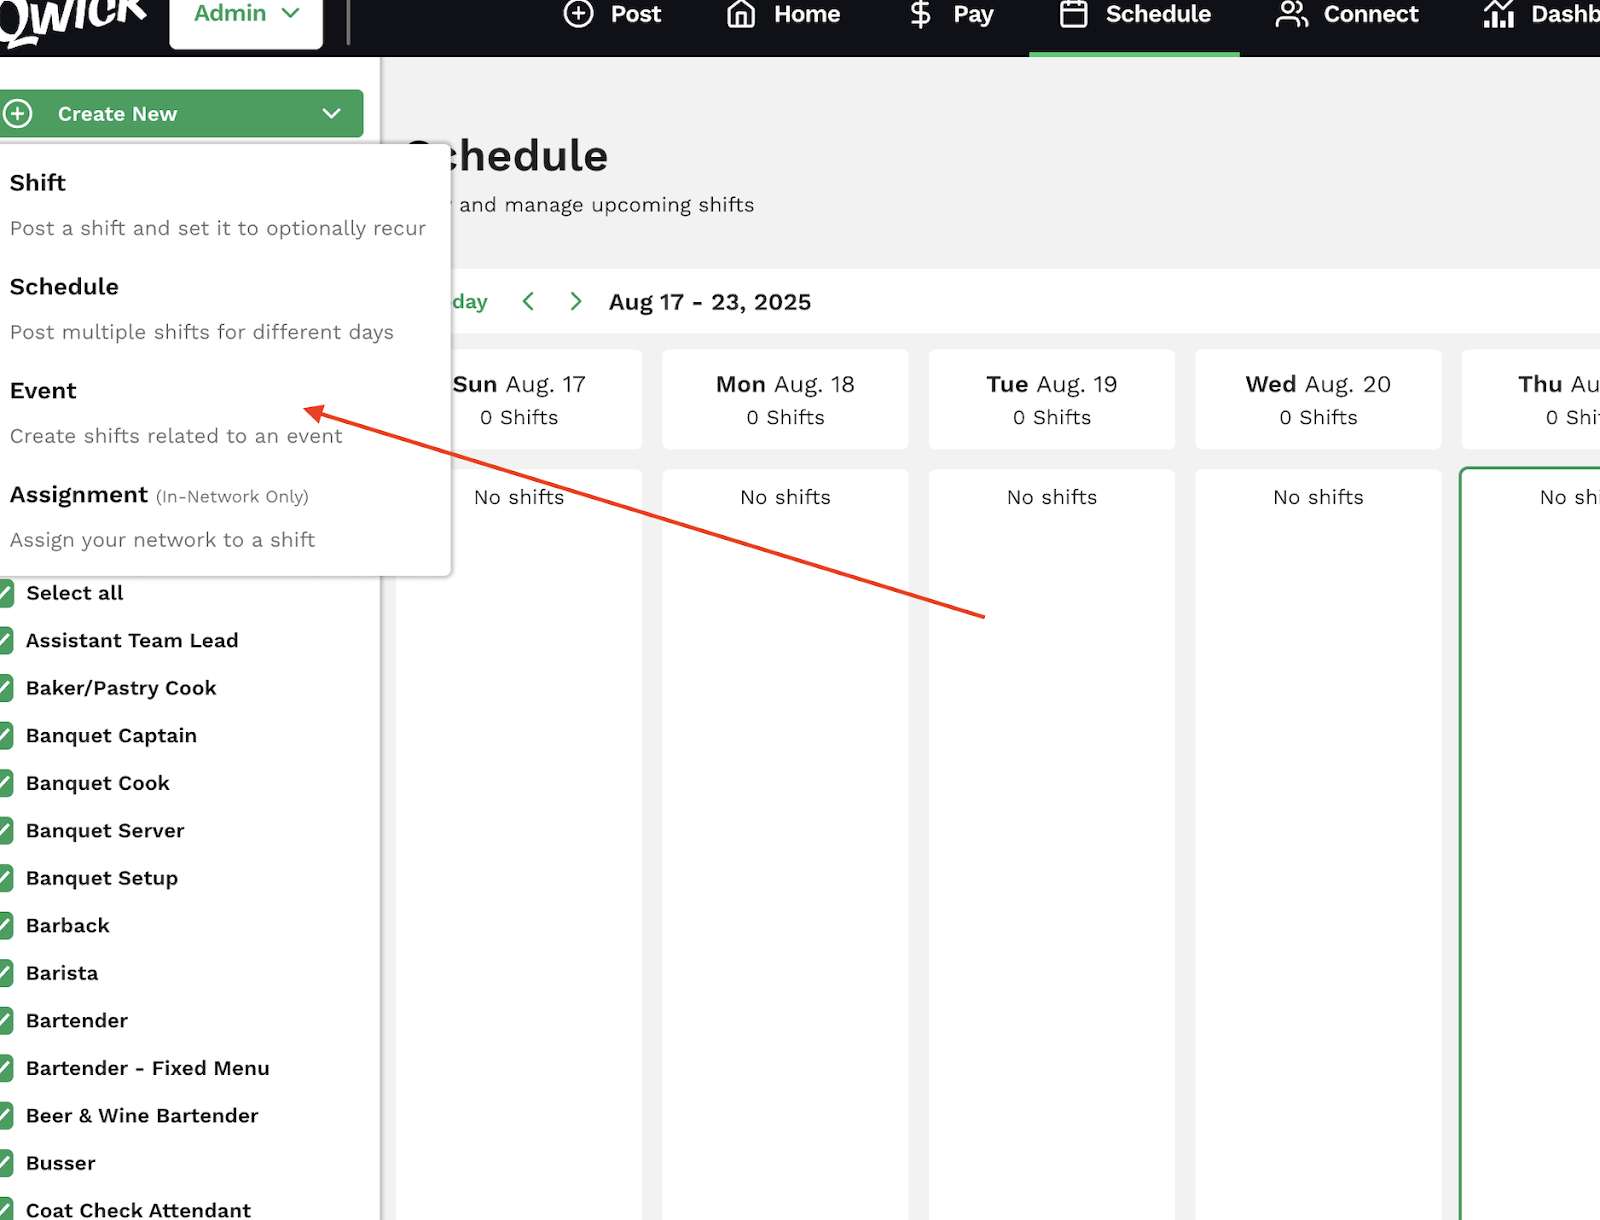
When you go to post a shift, you’ll notice three options: post shift, post schedule, and create event.
Select post shift if you want to post:
A singular shift (e.g., 1 dishwasher on May 1st)
Multiple shifts for the same role and day (e.g., 30 banquet servers on May 1st)
Any number of shifts for the same position that repeat on a set cadence, known as recurring shifts (e.g., 2 baristas every Sunday)
Select post schedule to post multiple shifts across various days and/or positions (e.g., varying quantities of event chefs, banquet cooks, bartenders, banquet servers, and banquet captains for multiple events throughout the month).
Select create event to post multiple shifts tied to a specific event (e.g., all positions needed for a 3-day music festival or catering shift).
Learn more about posting a shift here—for the rest of this walkthrough, we’ll focus on how to post a schedule and create an event through the Qwick business app.
How to post a schedule
If you haven’t already, sign up with Qwick! Once you create an account and provide your business’s information, you can begin posting. It’s free to sign up with Qwick, and you only pay once you complete a shift.
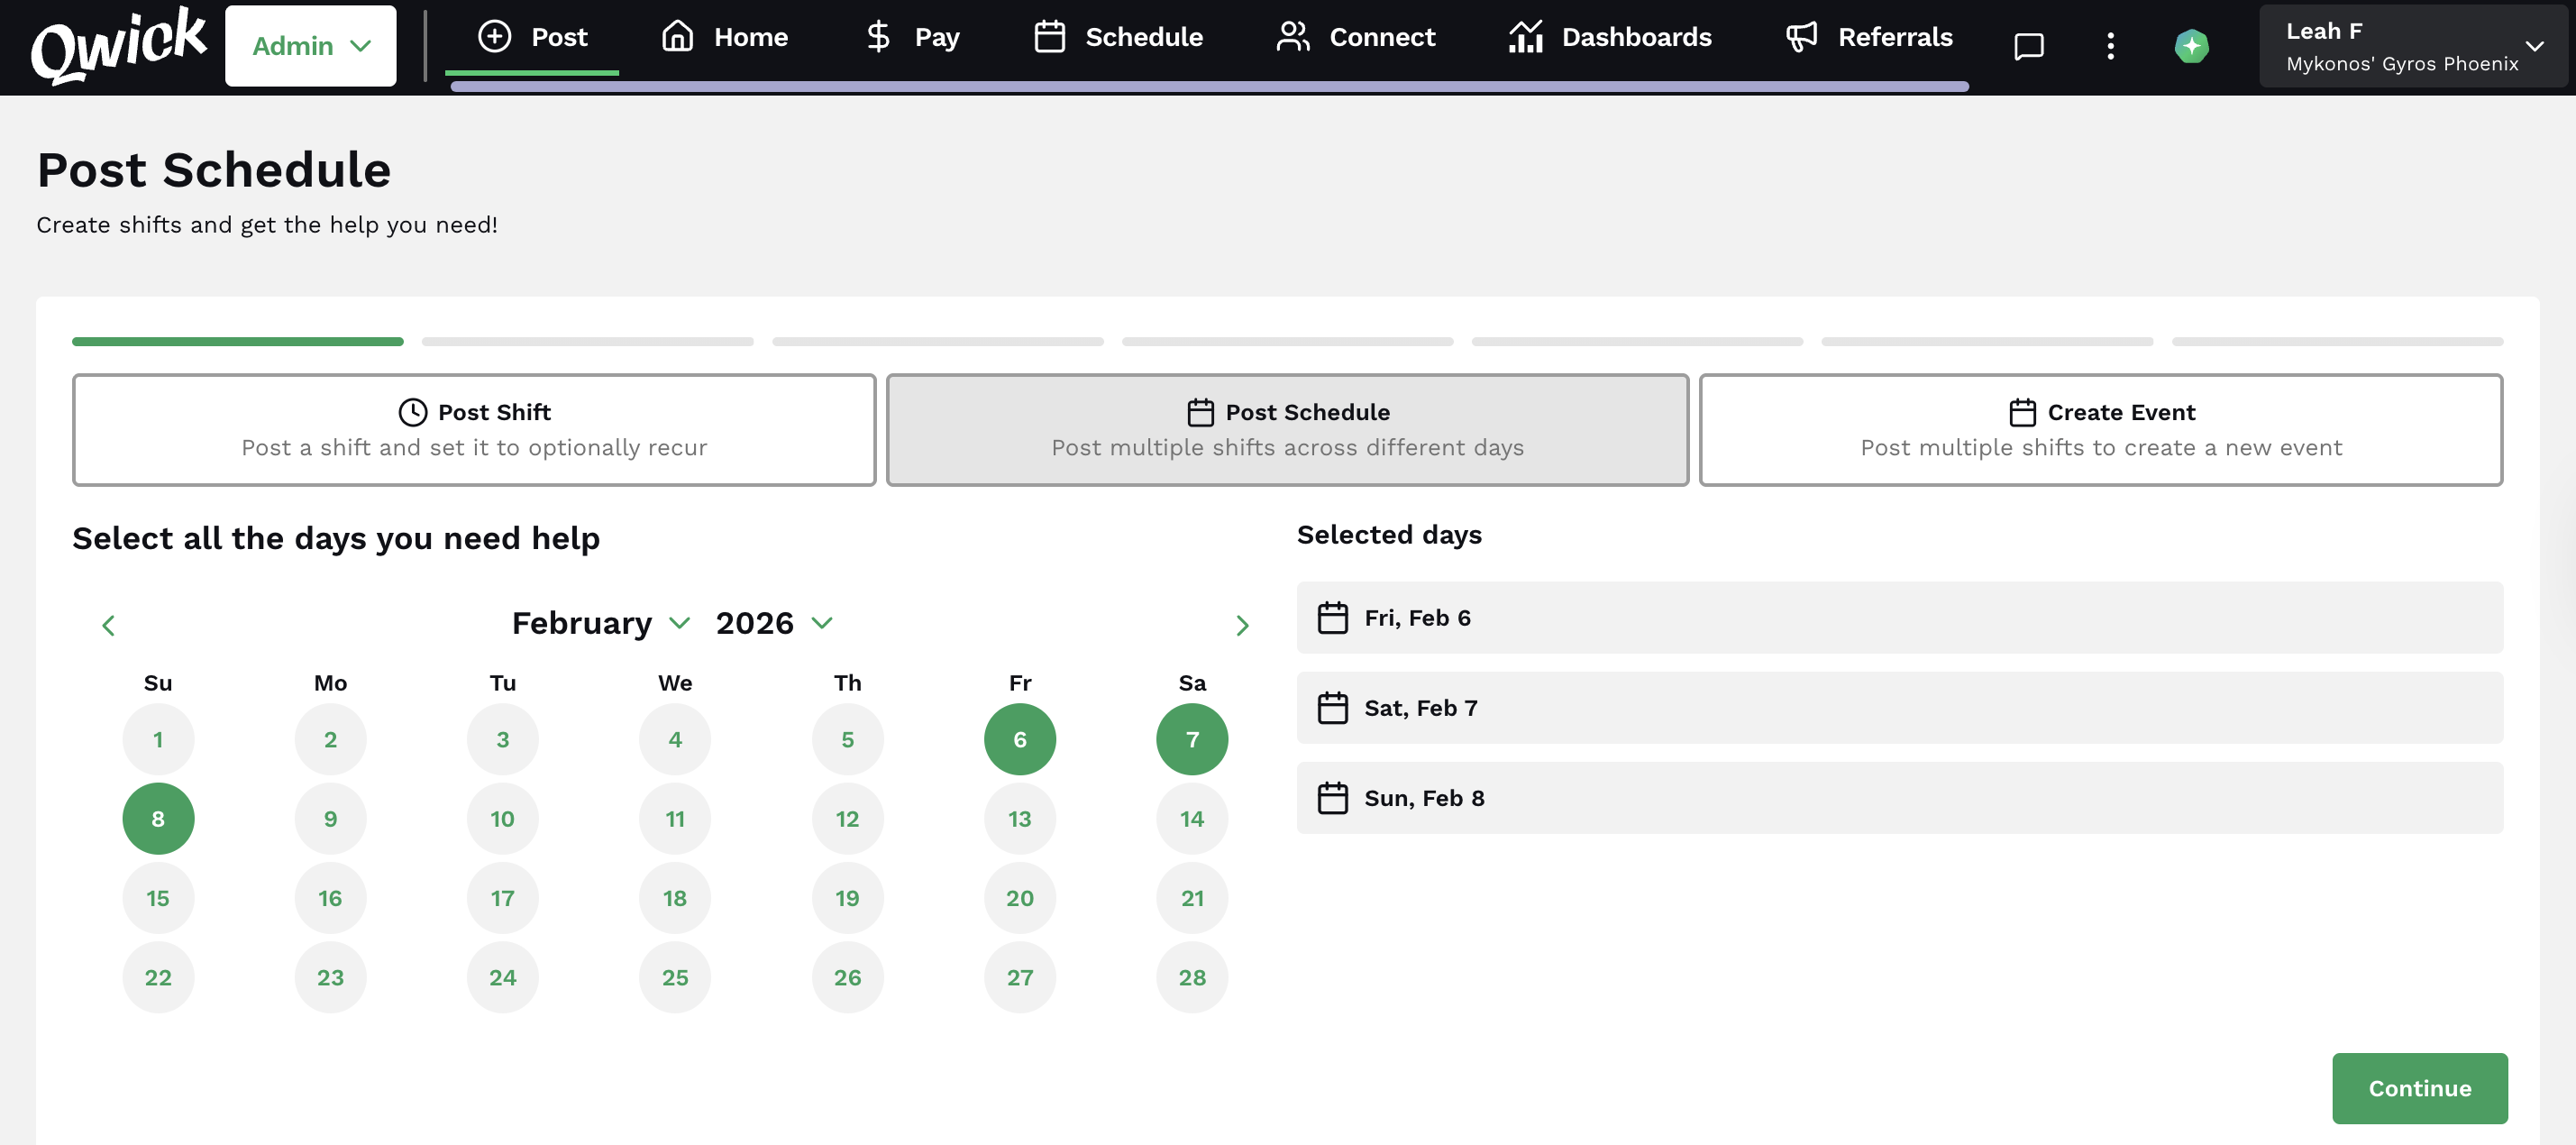
Sign in to the Qwick Business platform and navigate to the Post tab. Click post schedule and select all the dates that you need shifts filled on. Press continue.
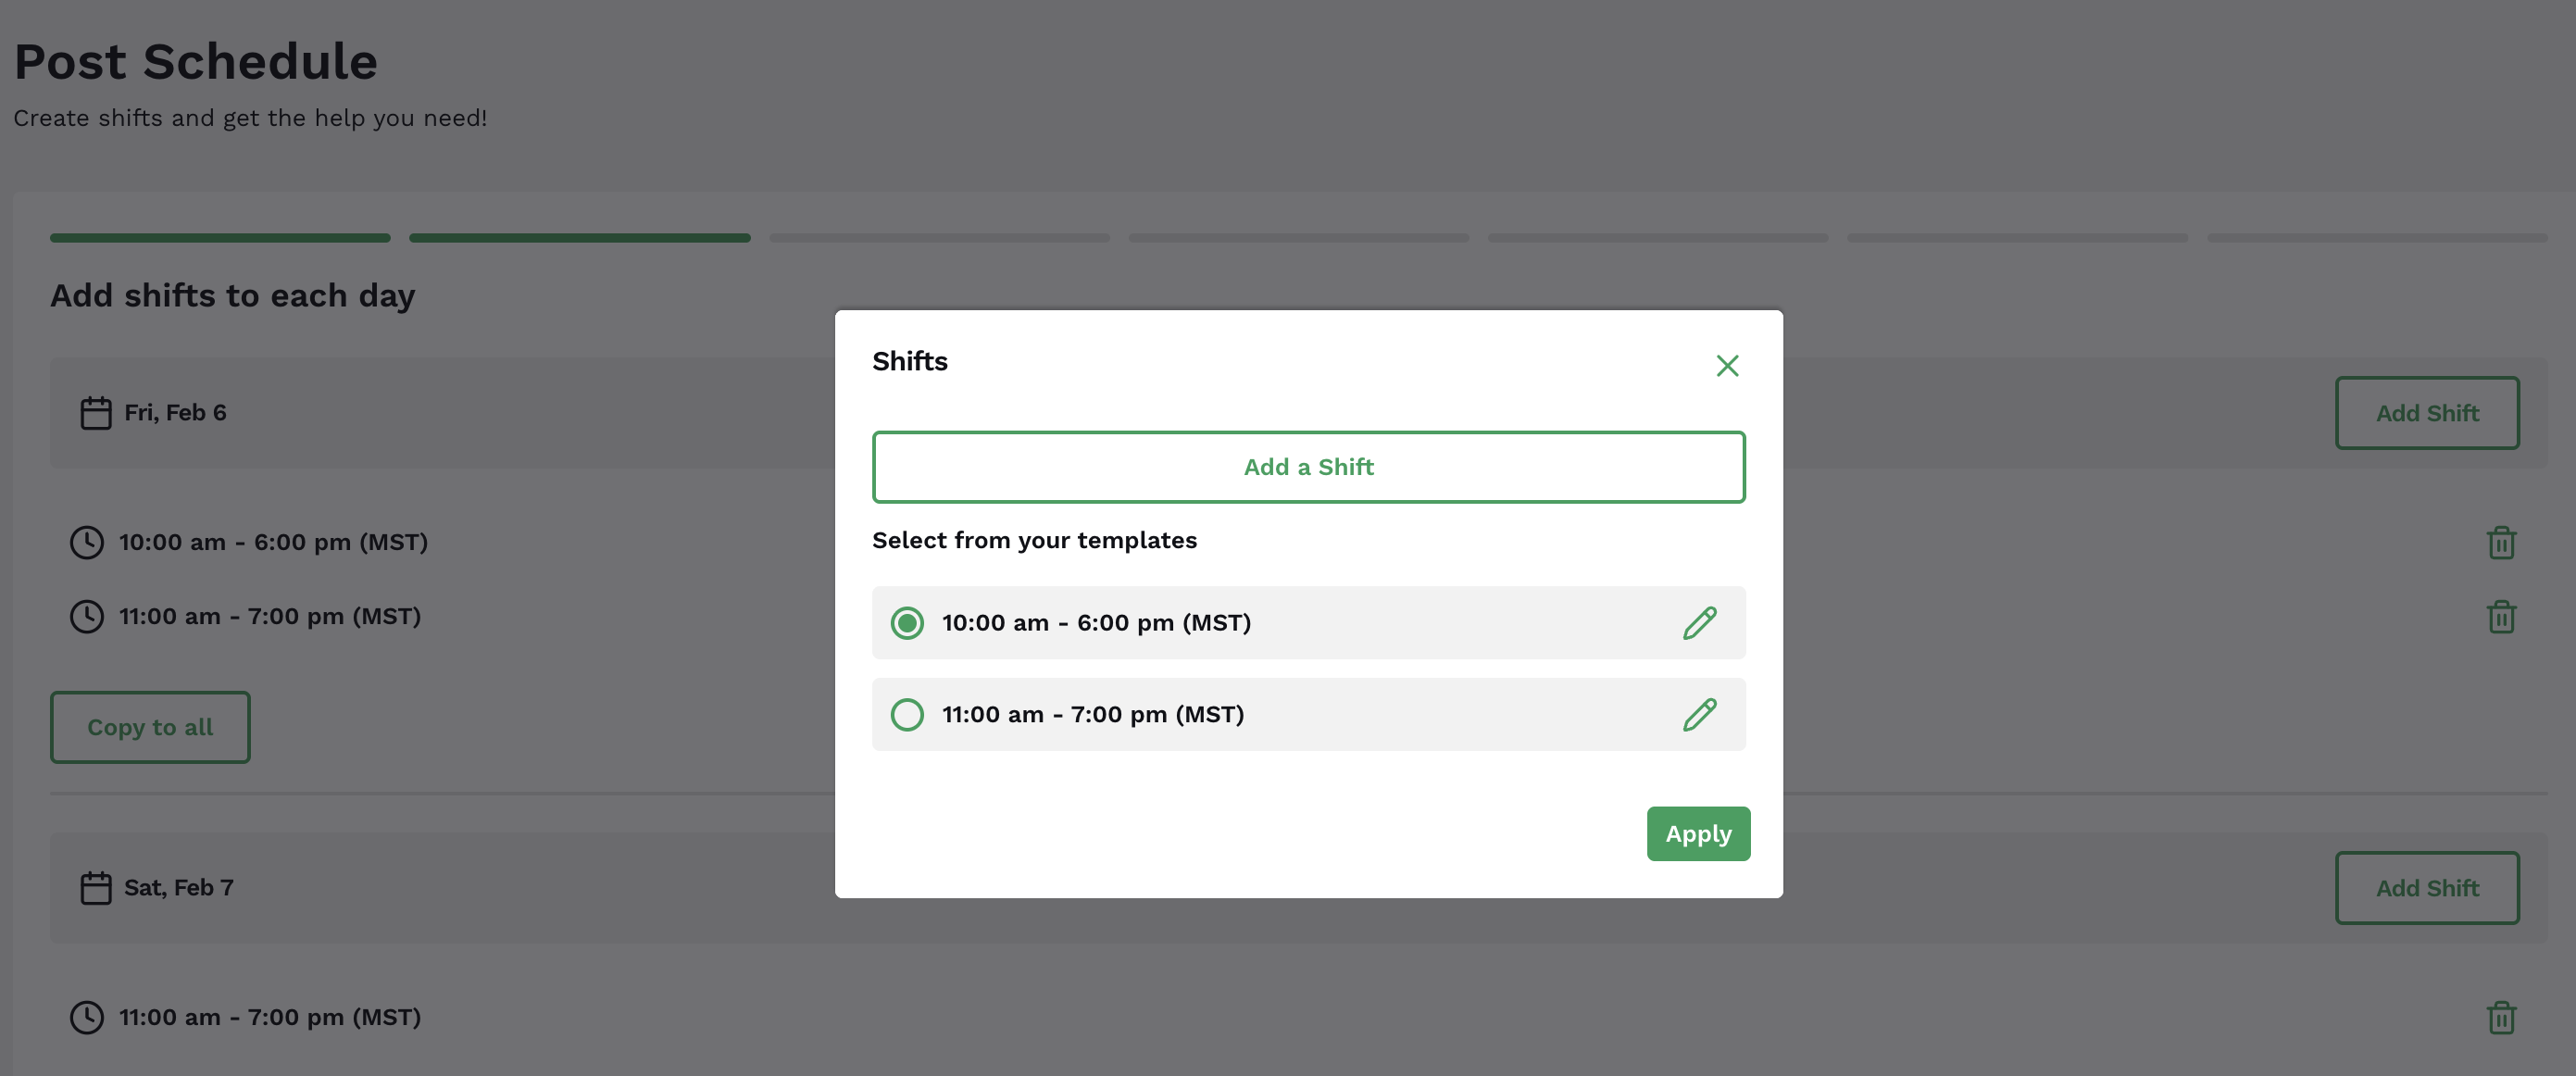
Next, click add shift and select all of the shift times you will need that day. Consider all the various positions you will be posting when selecting the timeslots, but don’t worry about the quantities of each shift in this step. You can select shift times from your saved templates or enter new shift times. Press apply to save your selections for each day, then make your way down the list of dates adding shifts, and click continue when you are finished.
(Tip: If you need shifts at the same time for each day, click copy to all to add the shift to all days in the schedule.)
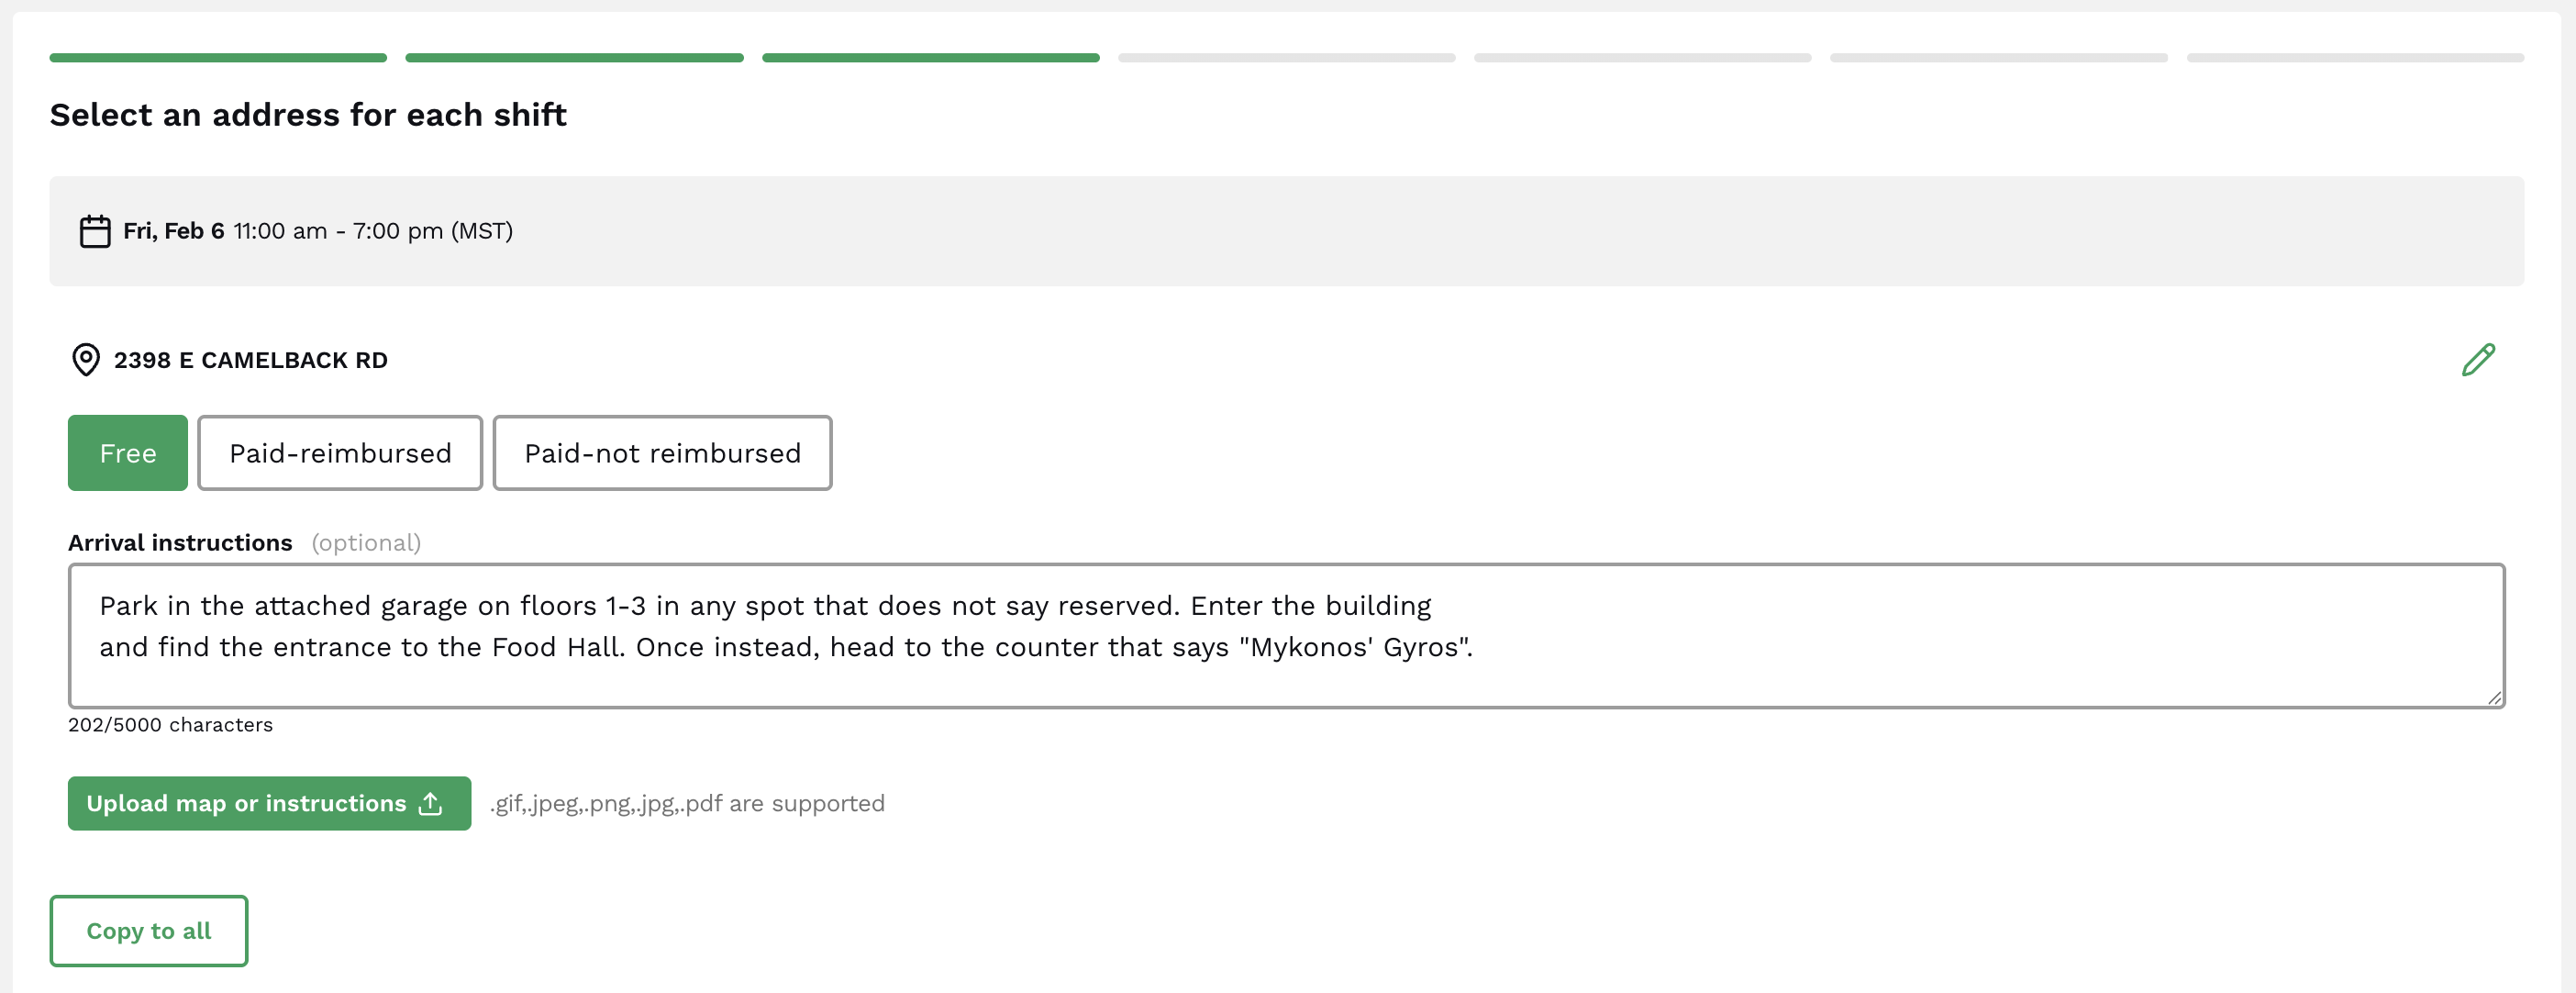
Now, you will see all the shifts in the schedule, organized by date and time in a list, and be prompted to enter an address, parking details, and arrival instructions for each shift. You can customize each shift's address, or, if they all share the same location, create a new venue template by clicking the pencil icon next to the address and click copy to all to automatically fill in the address for all shifts. Press continue when you are ready to proceed.
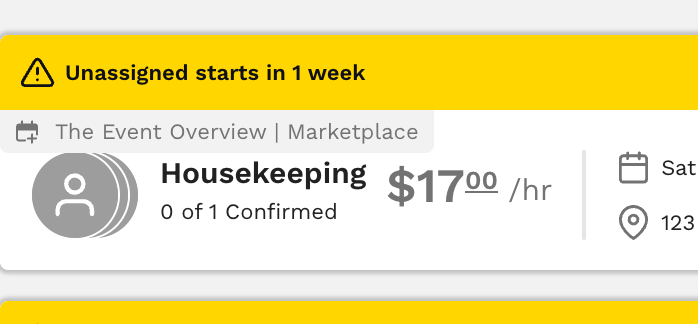
In a similar manner to the last two steps, you will now be prompted to add positions for each shift in the schedule. For each shift, click add position and select as many positions as you want for that specific date and shift time. This is also where you set the wage for each position and shift, as well as who can apply to the shift.
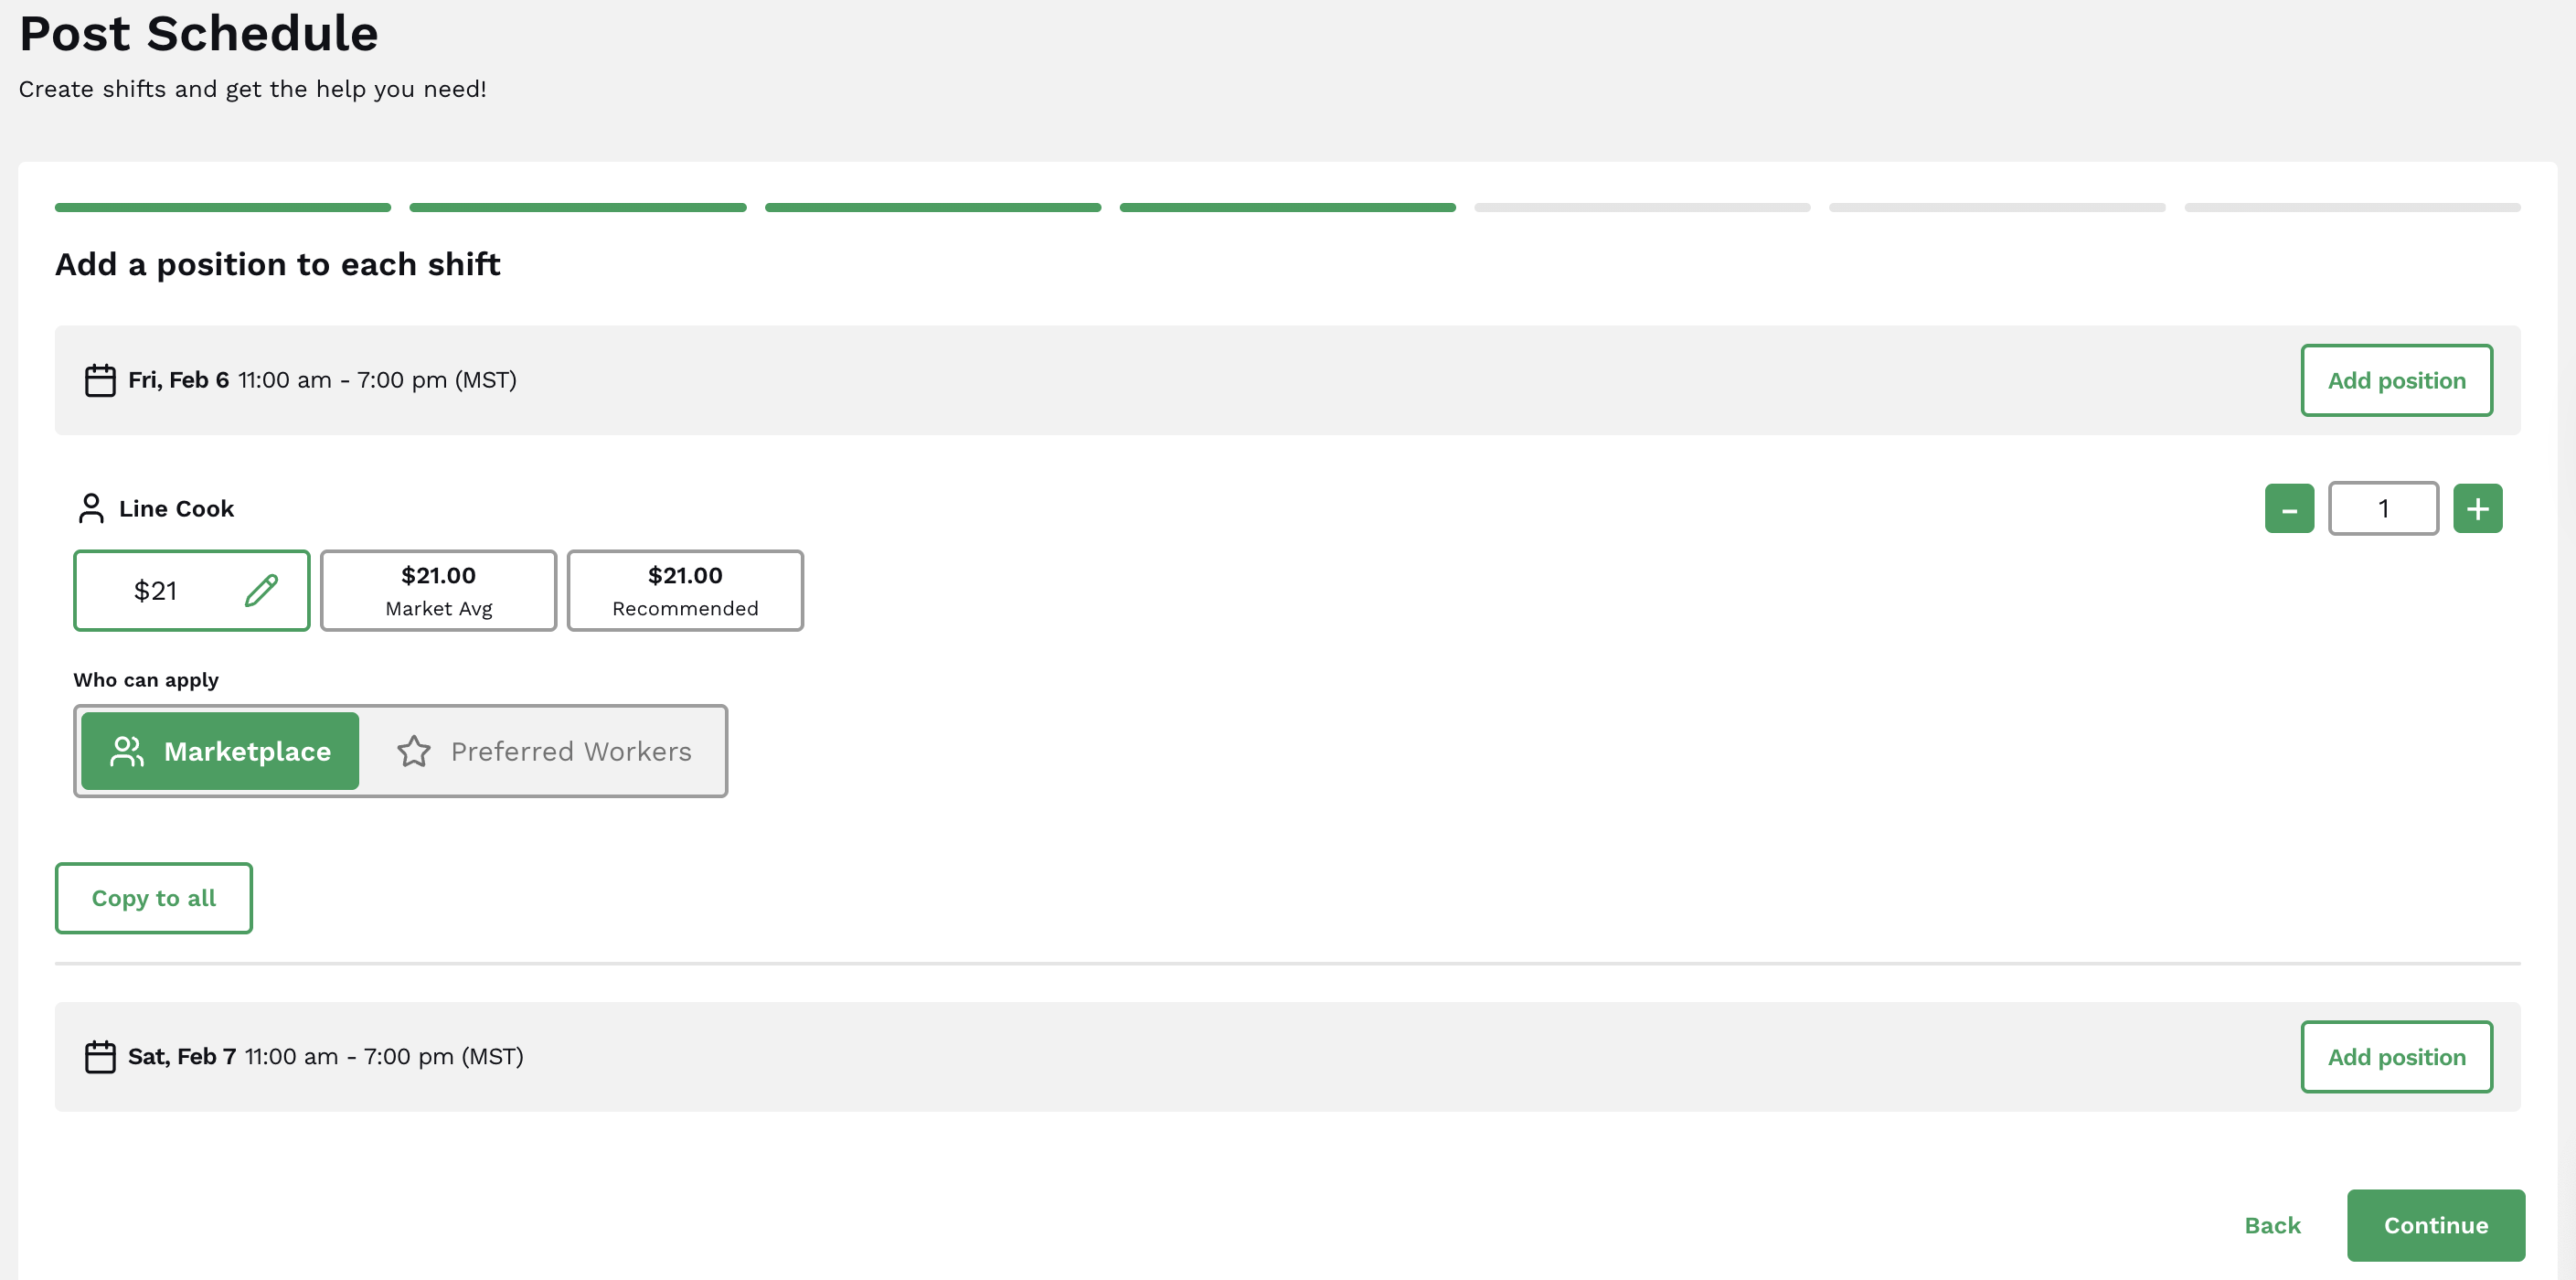
(Tip: Save your positions as templates to easily access and edit them for future shift postings!)
Posting to the marketplace makes the shift visible to all eligible professionals in your area, while selecting preferred workers limits visibility to professionals who have already worked with your business or are saved in your groups and allows you to send direct offers to specific pros. Learn more about selecting preferred workers here.

Again, the copy to all button is there to make your life even easier if you want the same position across all shifts in the schedule. Press continue once you have accounted for all positions.
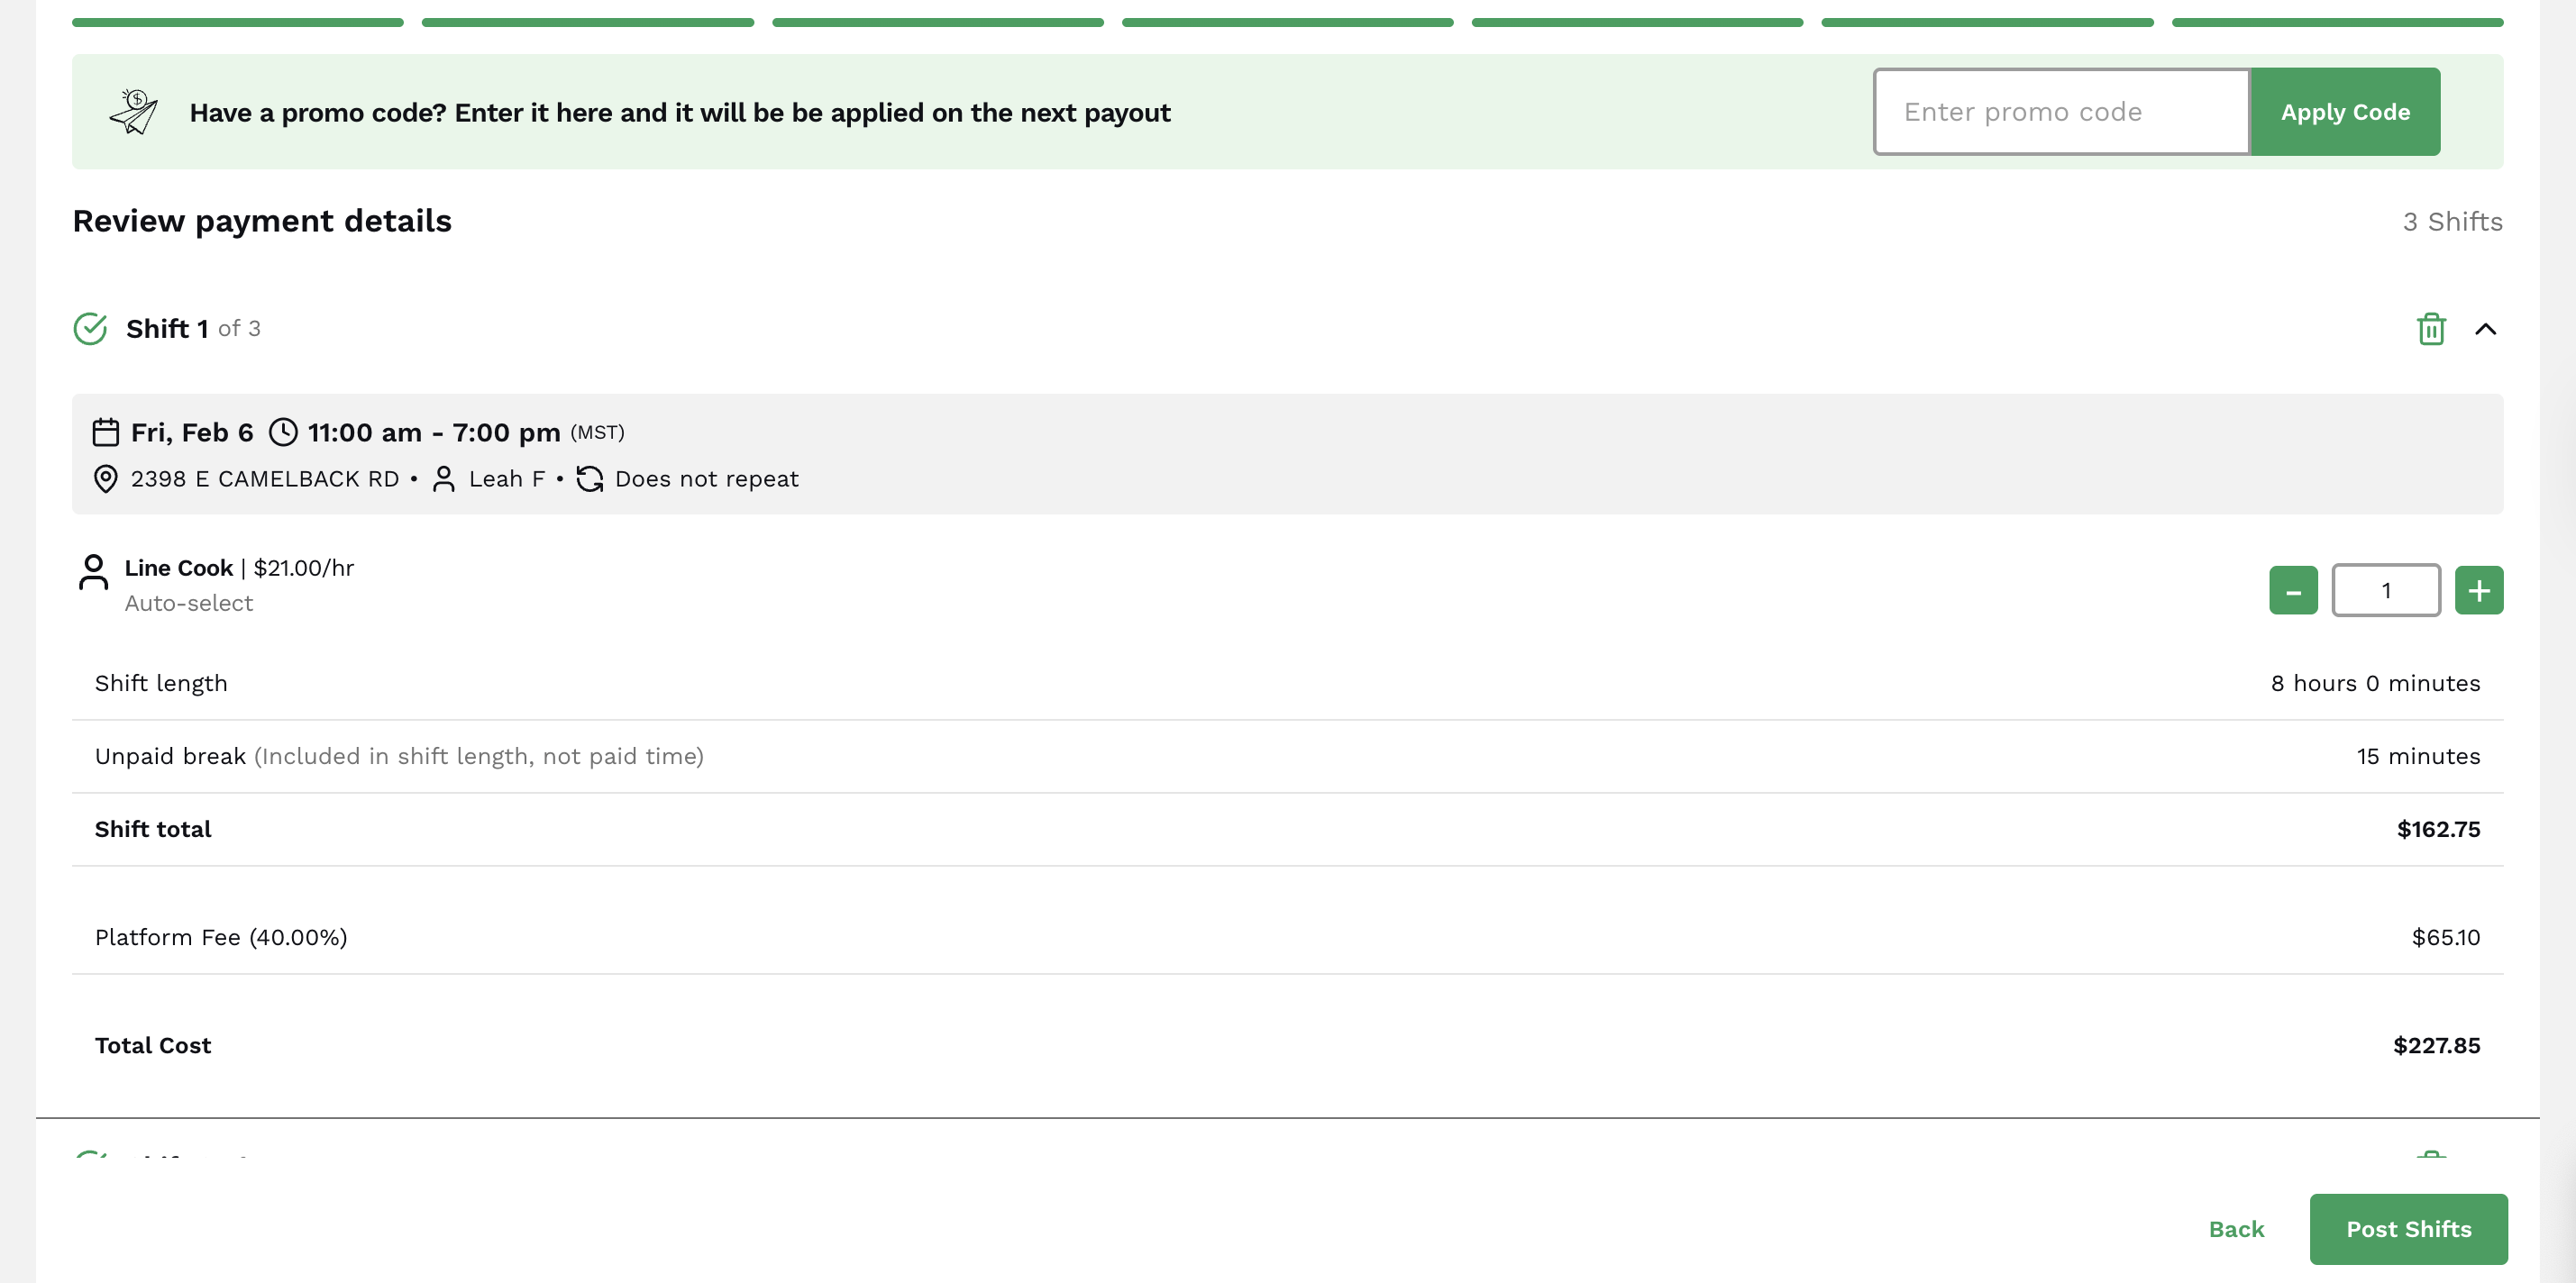
Next, add the allotted breaks for each shift and press continue.
Then, specify the managers on duty for each shift. The most recent manager for each position will be auto-populated, but you can make adjustments by clicking the pencil icon to the right of each name. Press continue once all of the information is correct.
If you have a promo code, enter it and press apply code. Otherwise, review the payment and schedule details for accuracy, then click post shifts!
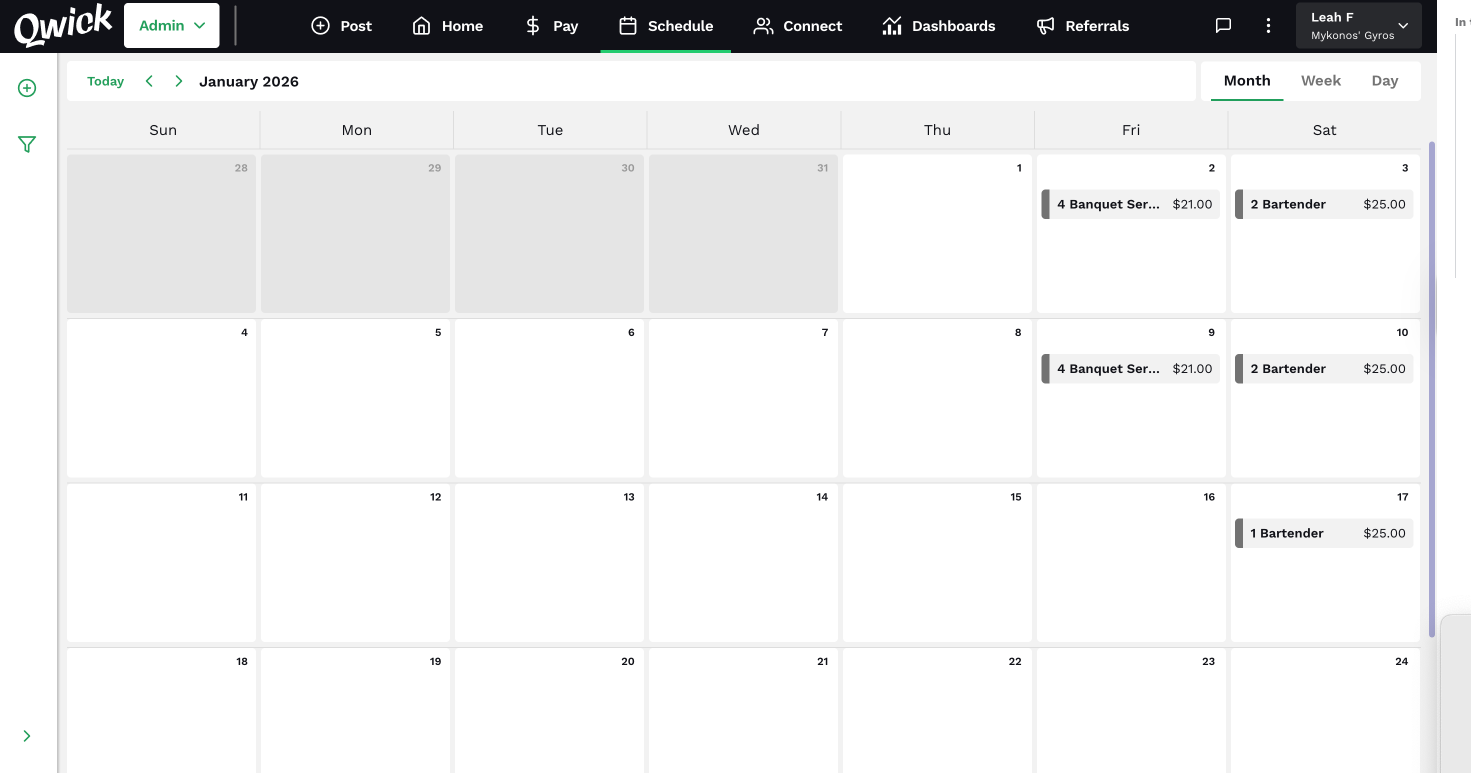
Easily manage your schedule via the schedule tab, where you can see all the shifts you’ve posted in a calendar or list view!
Prefer a video walkthrough? You’re in luck! Here’s a quick overview of how to post a schedule on the Qwick platform.
Benefits of posting schedules
Efficiency + time savings
By posting an entire schedule at once, you save time and effort compared to posting individual shifts repeatedly. This streamlined process allows you to complete staffing for an event, week, or even a month or more in one sitting, then mark filling shifts off your to-do list and focus on other tasks.
Improved visibility + attraction
The more shifts your business has live on the Qwick platform, the more professionals will see them and take notice of your business as a top workplace. (Pros love active businesses with frequent shift opportunities!) Posting a schedule not only increases visibility but also helps attract top talent. As the shifts are posted further in advance, you can snag top performers before they make other plans.
Effective workforce management
When shifts are posted as a schedule, it’s easier to secure repeat workers via bundled shifts, or confirm requested pros through direct offers. Not only that, but it makes it easier to get a picture of all of your upcoming shifts on the schedule tab’s calendar view. Seeing everything centralized in one place makes it easy to gauge your staffing levels at any given moment and make adjustments if needed.
How to create an event
Click the Create New button, then select Event.
Type in the name of the event, then continue through the shift posting flow as outlined above. All shifts that you add will be tied back to this event. (If there are existing shifts you want to add to the event as well, you can do so after the event is created.)
Want to see this feature in action? Allow our VP of Product to walk you through creating and managing events here.
Benefits of creating an event
The event feature was designed with caterers and event producers in mind, giving them a tool that not only takes care of staffing, but keeps them organized while doing it.
Once your event shifts are posted, you can easily manage them from your event page. To get there, you can either…
A) Navigate to the Schedule tab and click on shifts that are part of the event;
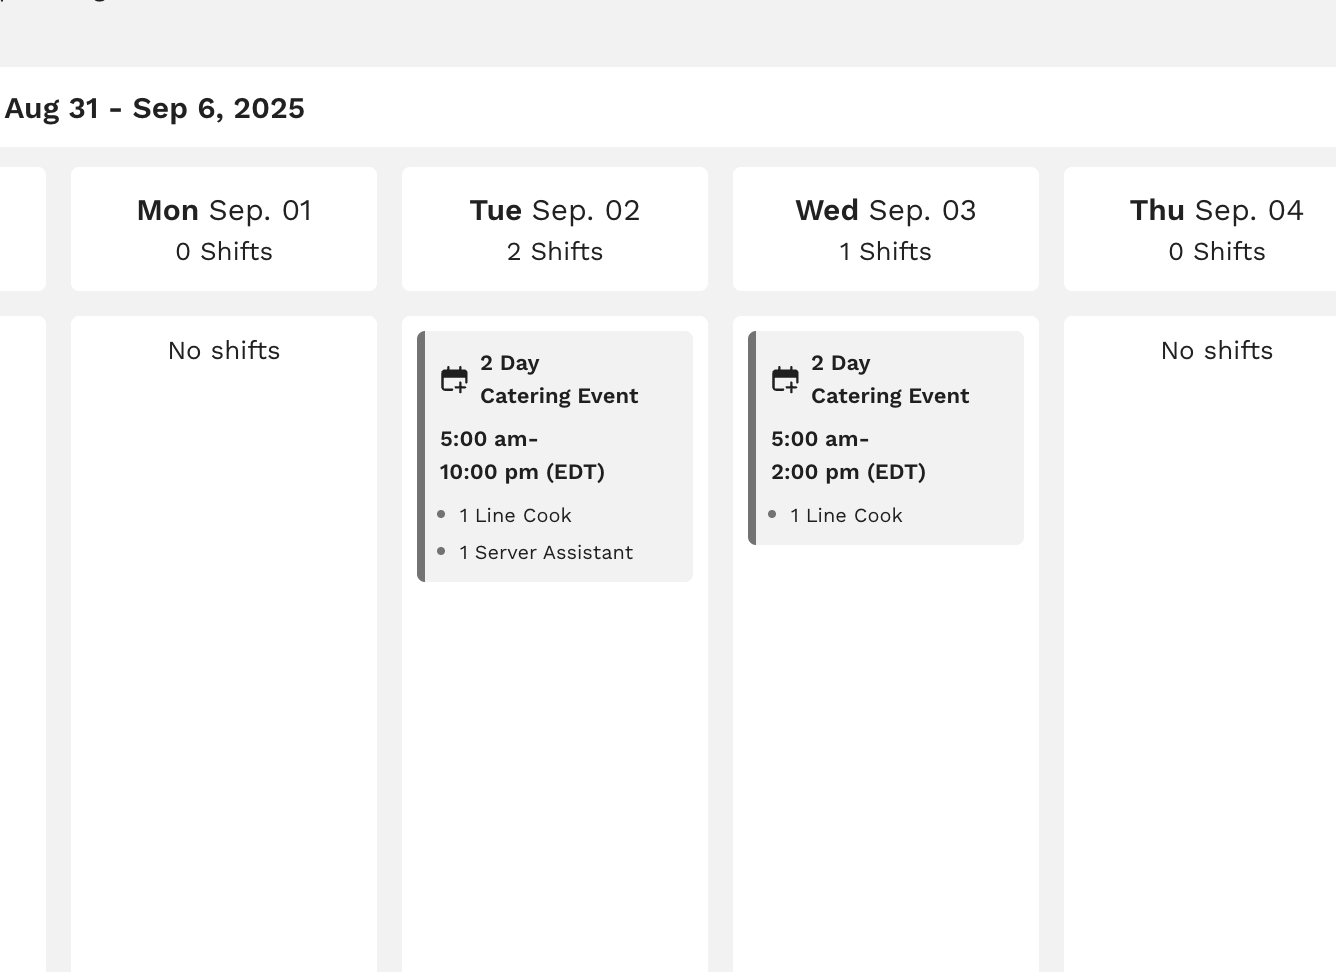
B) Click on the event tags shown on shifts in the upcoming shifts section of the Home page.
Completing either of these actions will bring you to the event management page for the corresponding event.
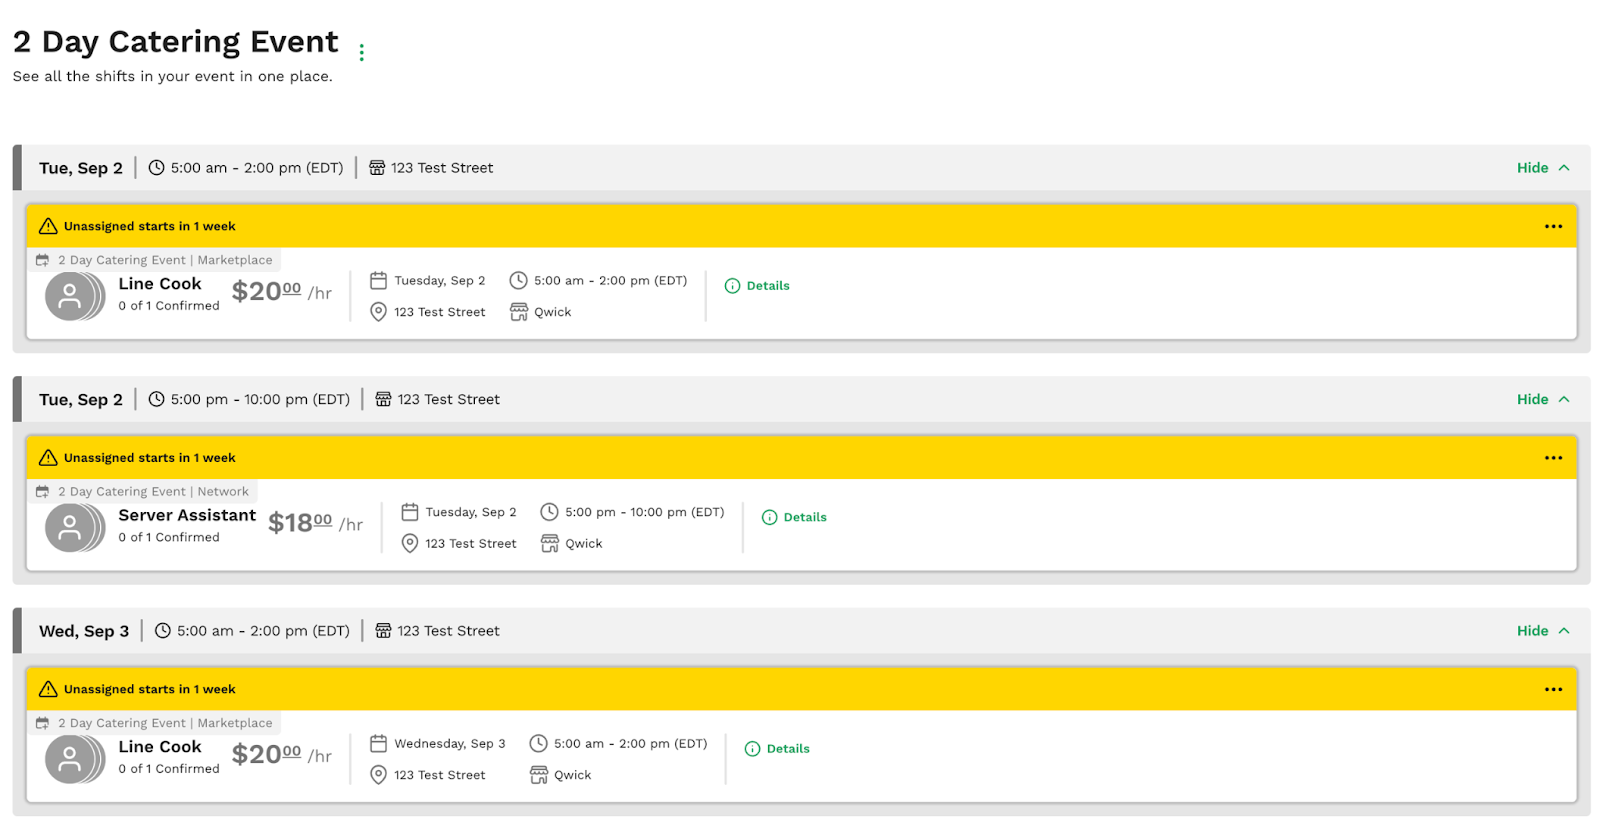
On the event management page, you can see an overview of all of your shifts tied to the event. Click the three dots to the right of the event name to edit the event, add shifts, or cancel the event.
Ready to create an event? Click here to get started!
Other ways to streamline your staffing with Qwick
You’re well on your way to saving time by posting schedules, but why stop there? Explore these other Qwick features, which will help streamline your staffing game even further…