
Applying to and confirming shifts with Qwick
You're here because you want flexible shifts that fit your schedule, allow you to earn money, showcase your hospitality skills, refine your craft, and build new connections in the industry you love. Well, you've come to the right place—Qwick was created to help you achieve just that!
Read on for all of the essential information you need to know as you apply for, confirm, and work shifts on Qwick.
Applying for shifts
In most cases, to be confirmed on a shift, you will first have to apply for that shift. (The other way is to receive a direct offer.) To get the most out of the Qwick app, it’s important to get into the habit of regularly applying for shifts on the platform. Here’s how:
To begin, open up the Qwick app. (If you haven’t created an account yet, you’ll be prompted to do so when you first open the app. Qwick is free to use for all professionals!)
Once you’re logged in, you will be taken to the home page. This is where you can view all the available shifts near your location. (If you need to update your location, you can do so at any time in Settings.)
You can filter and sort shifts based on various criteria, including pay rate, shift date, position, day of the week, whether experience is required, and more.
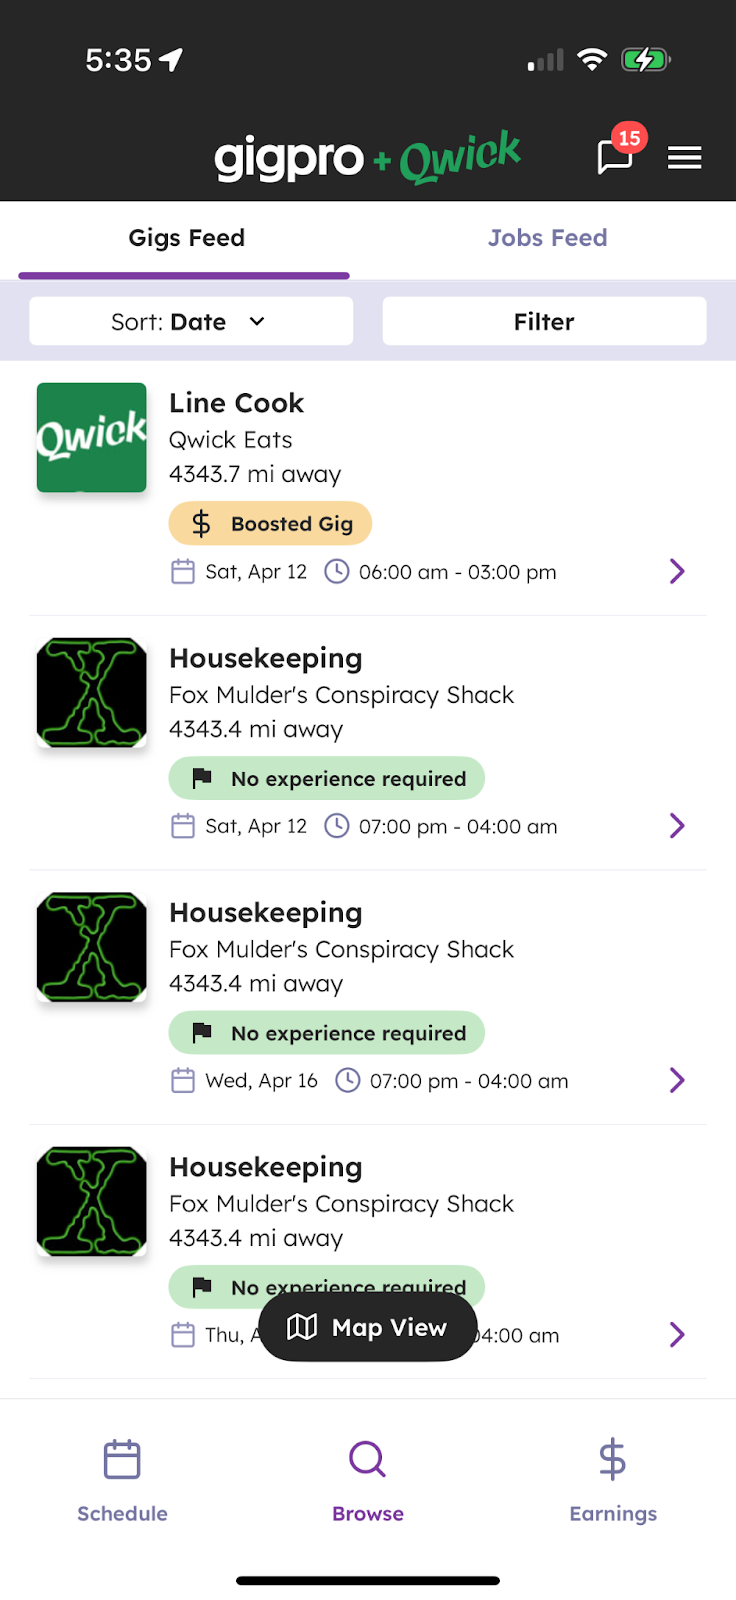
When you see a shift that interests you, click on it to view the full shift description. You’ll see an overview of the shift written by the business, the address of the shift, requirements like dress code or tools to bring, and a transparent summary of the earnings you can expect if you work the shift.
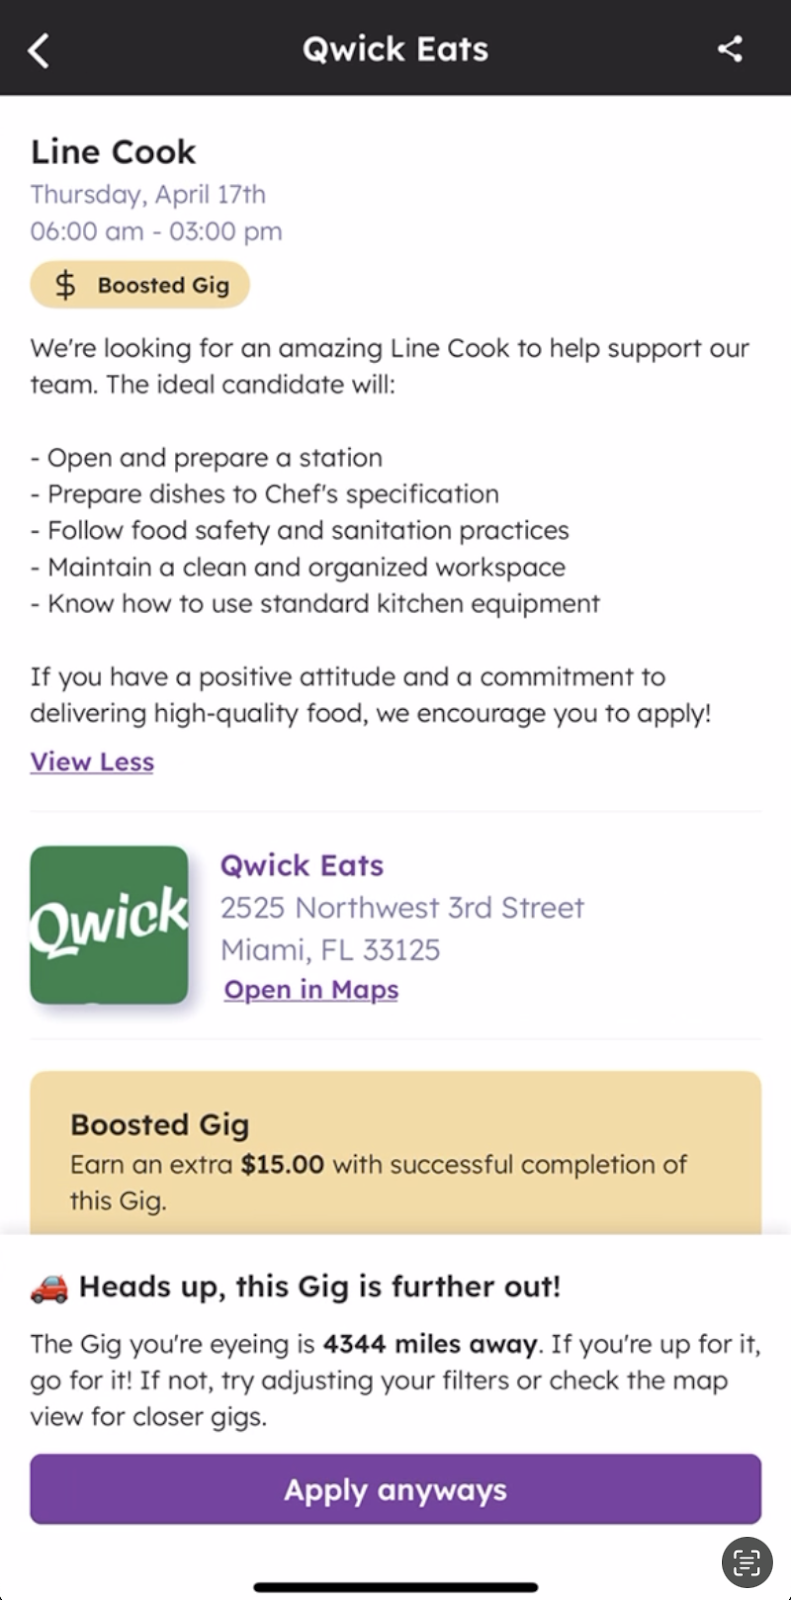
To apply for the shift, click Apply, and you will be considered for the shift.
Please note: Simply applying for a shift does not confirm your spot on the shift or mean you are expected to show up to the shift. Professionals are only expected to show up for shifts once they have been selected by the business and have confirmed their availability.
Once you’ve successfully applied, you will wait for the business to select you for the shift. You’ll be notified in the app if you're selected and asked to confirm the shift before it's officially added to your schedule.
How to increase your chances of being selected for a shift
To increase your chances of being selected by a business for a shift, we recommend the following:
Fill out your profile completely and thoroughly. Your profile is your first impression to a business. Ensure that it accurately and positively reflects your skills, professionalism, hospitality work experience, and relevant industry certifications (e.g., ServSafe, ABC) to give you the best chance of being selected.
Pay extra attention to your “About” section, as it is displayed prominently to businesses. We suggest concisely calling out your years of relevant experience, special skills, and certifications.
Don’t be afraid to add some personal touches, but avoid sharing personal information, such as your phone number.
Proofread your writing for typos!
Apply to as many shifts as possible. We know you want the best-paying shifts at the most exciting locations. You’re not alone! The more shifts you work, the greater the likelihood you’ll be picked for future shifts. Unfortunately, that means it can be a bit of an uphill climb at the start. Increase your chances of securing your first shift by applying to as many shifts as you can. (That said, only apply for shifts where you’re qualified and certain you can show up.)
Make sure your app notifications are on. When you are selected for a shift, you’ll want to confirm it quickly! Multiple pros can be selected for a single role, and the first person to confirm will be assigned to the shift.
Avoid no-shows or shift cancellations. Businesses can see the number of shifts you’ve worked, as well as your completion percentage. Dependability is a crucial trait for being selected for a shift, so protect your profile ratings by only confirming shifts you know you can attend.
Strive for a 5-star rating. Speaking of ratings, once you land your first shift, it’s essential to put your best foot forward and excel in your position so you can receive a 5-star rating, which will help boost your profile and secure you more shifts in the future!
Receiving a direct offer
Businesses can send direct offers to specific pros or groups of pros that they want to work with. If you receive a direct offer, first of all, congrats! Whether it’s your rating and experience that caught their eye or a positive impression you left working for the business previously, direct offers are a testament to your hard work.
If you receive a direct offer from a business, you have been “pre-selected” for the shift. You can skip the application stage, and all you have to do is confirm the shift to make it yours! Carefully review the shift details and verify that you are not only able to attend but can also fulfill all the requirements before confirming. If you can’t work the shift or don’t want to, that’s also fine. Simply decline the offer; your account is never negatively affected by shifts you choose not to accept.
Pro tip: We suggest reviewing and responding to direct offers as soon as possible. Direct offers can be extended to multiple pros and are filled with the first pro to successfully confirm the shift.
Confirming shifts
You’ve applied for a shift and been selected, or you’ve received a direct offer… now what? Here’s how to confirm the shift to officially add it to your schedule:
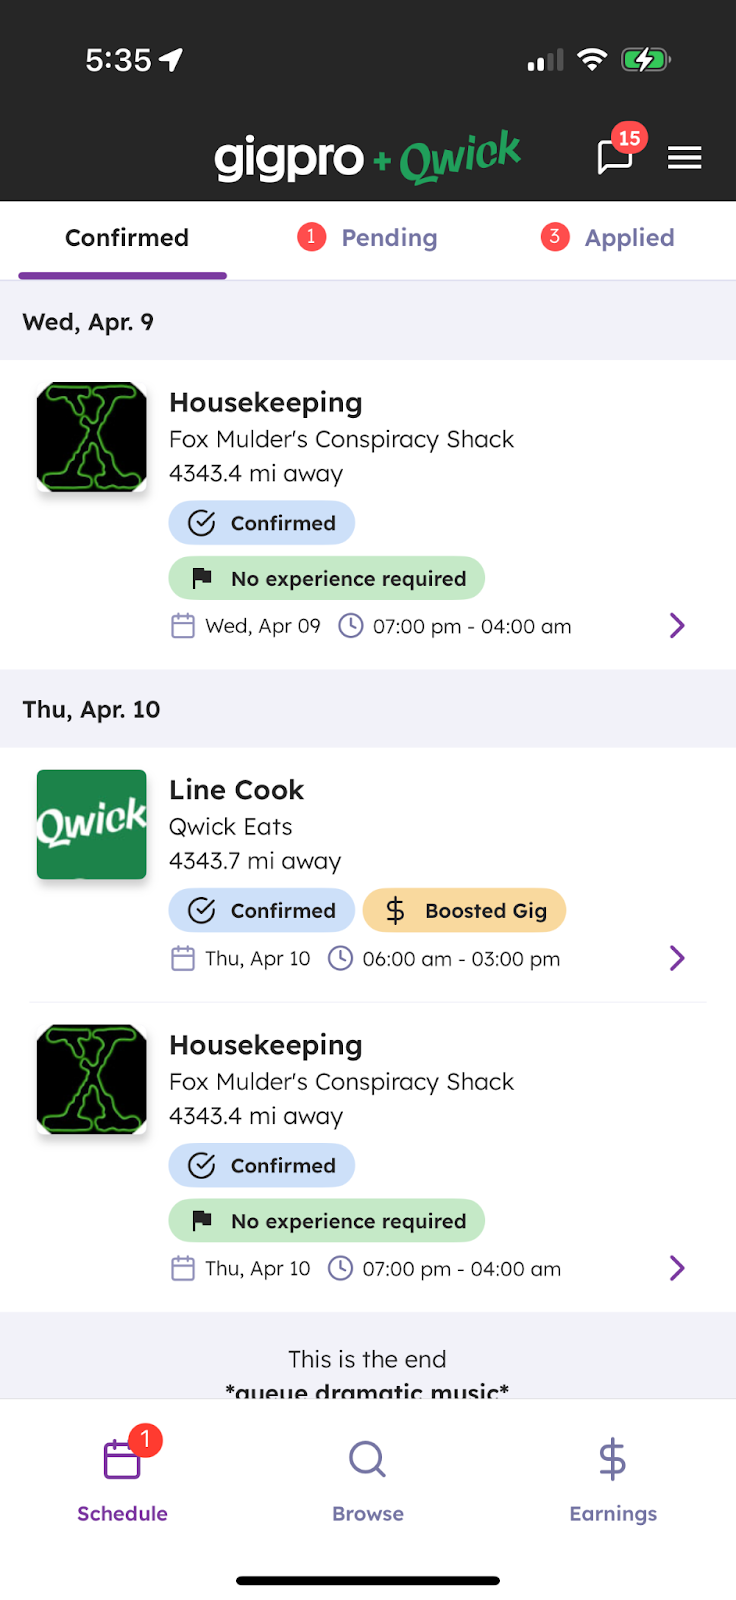
To see the gigs that you have applied for, visit the Schedule tab and click on Applied in the top right. This will display all the shifts for which you have applied but are still waiting to be selected.
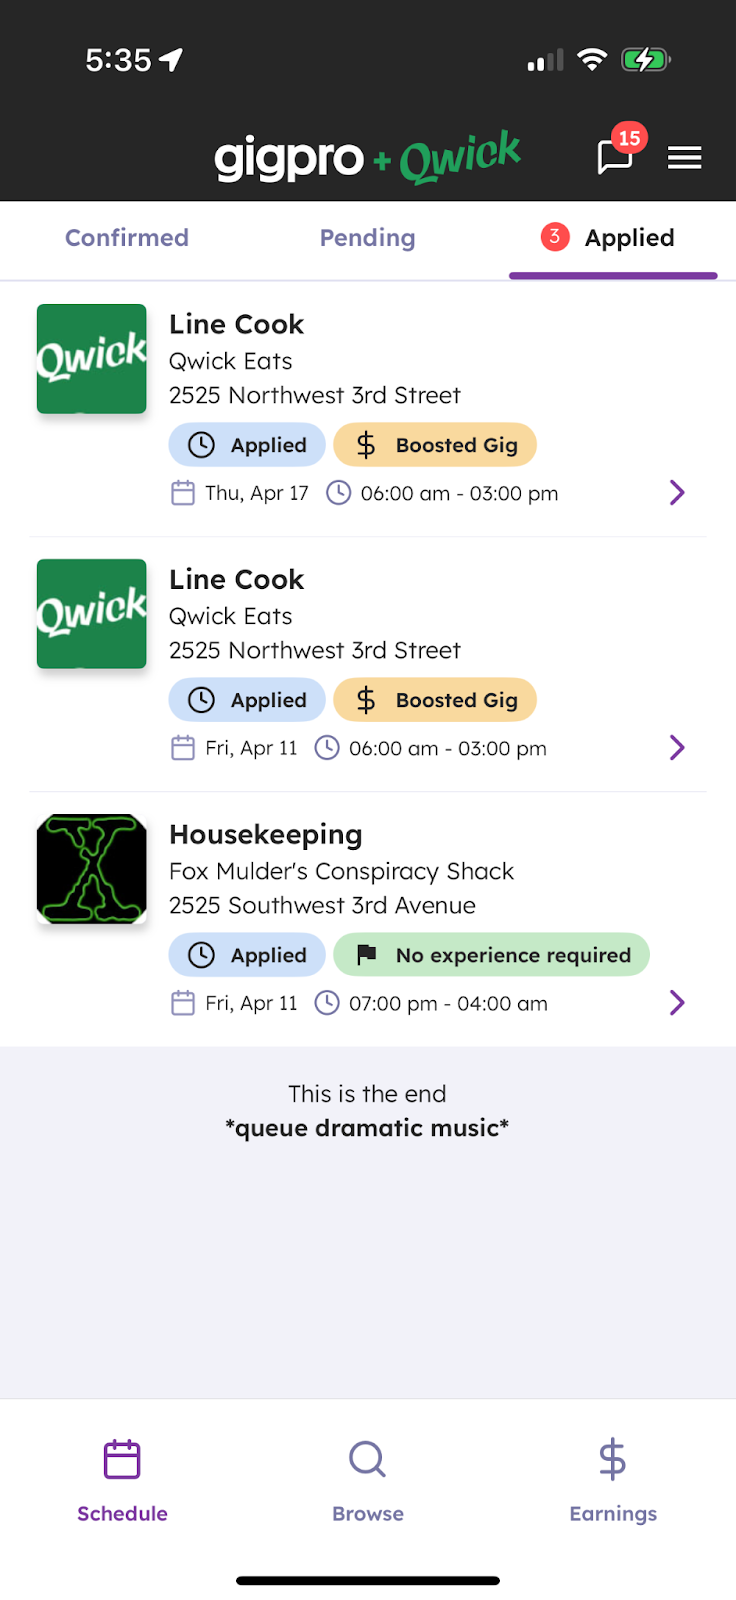
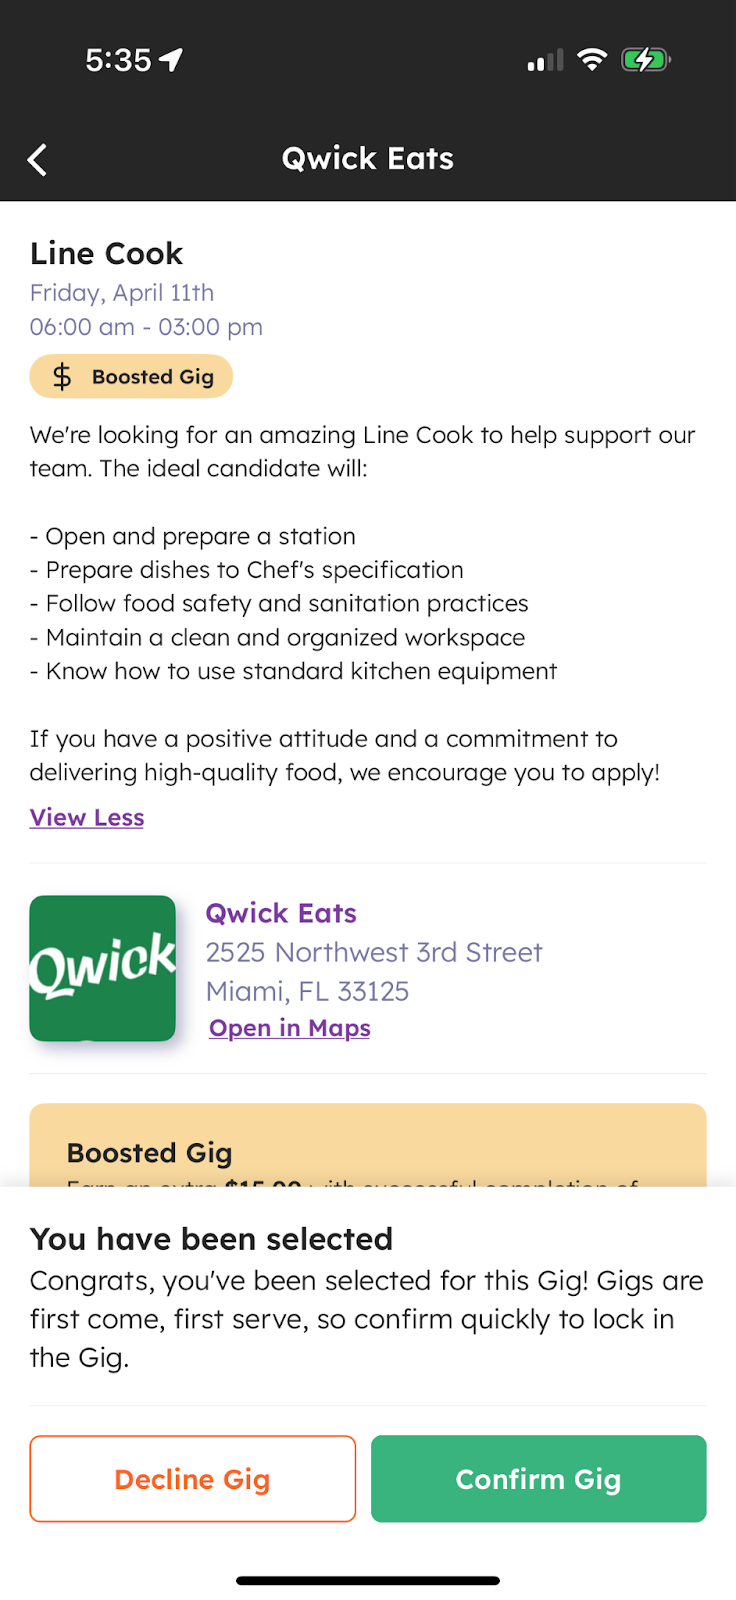
When a shift you’ve applied for selects you, or you receive a direct offer, the shift will appear in the Schedule tab under Pending.

From here, click on the shift to open the full description and confirm all of the details. If everything looks good and you’re available to work, click Confirm to add the shift to your schedule. Otherwise, feel free to Decline the shift—you won’t be penalized for declining a shift that you have not yet confirmed.
Once you confirm a shift, it will show on the Schedule tab under Confirmed. If a shift is listed on this page, it means the business expects you to arrive ready to work at the designated time and place. Please don’t forget to mark your calendar, arrange transportation if necessary, and ensure your proper attire is ready. Failure to show up for the shift will result in a penalty to your account.
Pro tip: Ensure your phone’s location sharing permissions are set to “always on”. The app will prompt you to set this permission, and your phone may ask you if you would like to keep sharing your location from time to time. This is an important feature to the app’s functionality; therefore, you will not be able to apply for or confirm gigs without this enabled.
Now that you have an understanding of how to apply for and confirm shifts, let’s talk about what to do once you have shifts on your schedule. Read our tips for things to consider before, during, and after your shift!